
Welcome to the Scrapbooking Global Blog Hop
The theme this month is:
The theme this month has been chosen by
When I saw the them for this month I did have to google different ways to use vellum. As my logo contains a butterfly I decided that I would make a scrapbook layout using vellum butterflies. I was very unsure how the velum butterflies would work out but still gave it a go.
How to make the vellum butterflies for the Scrapbook Layout
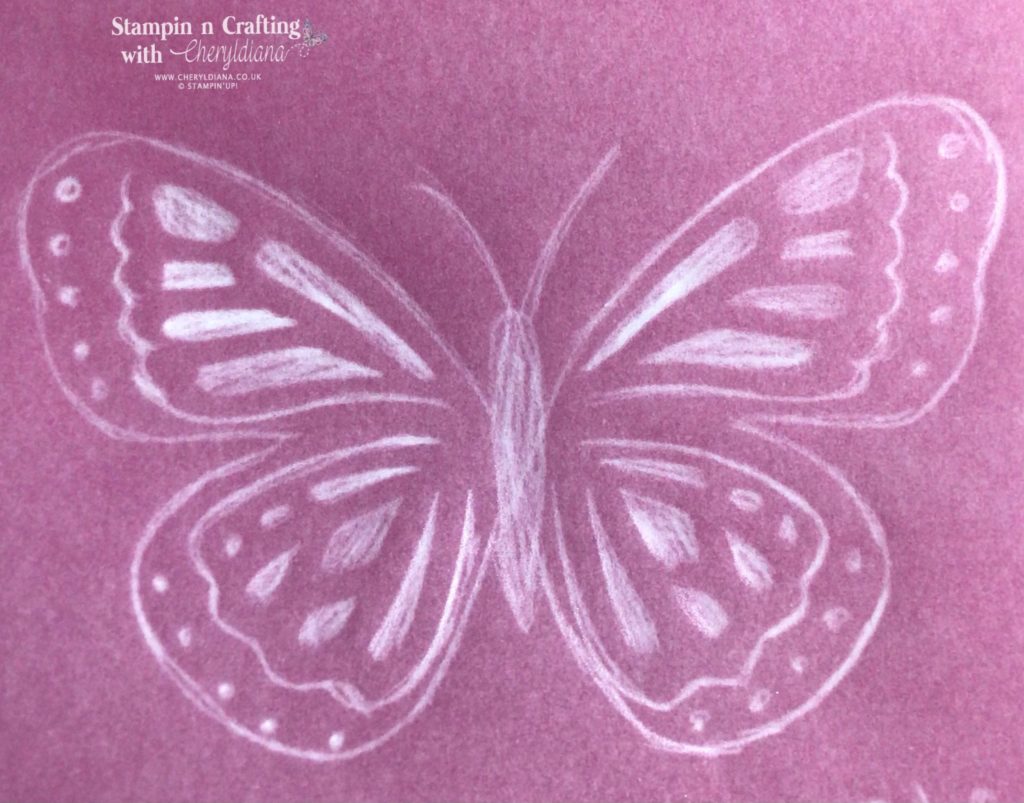
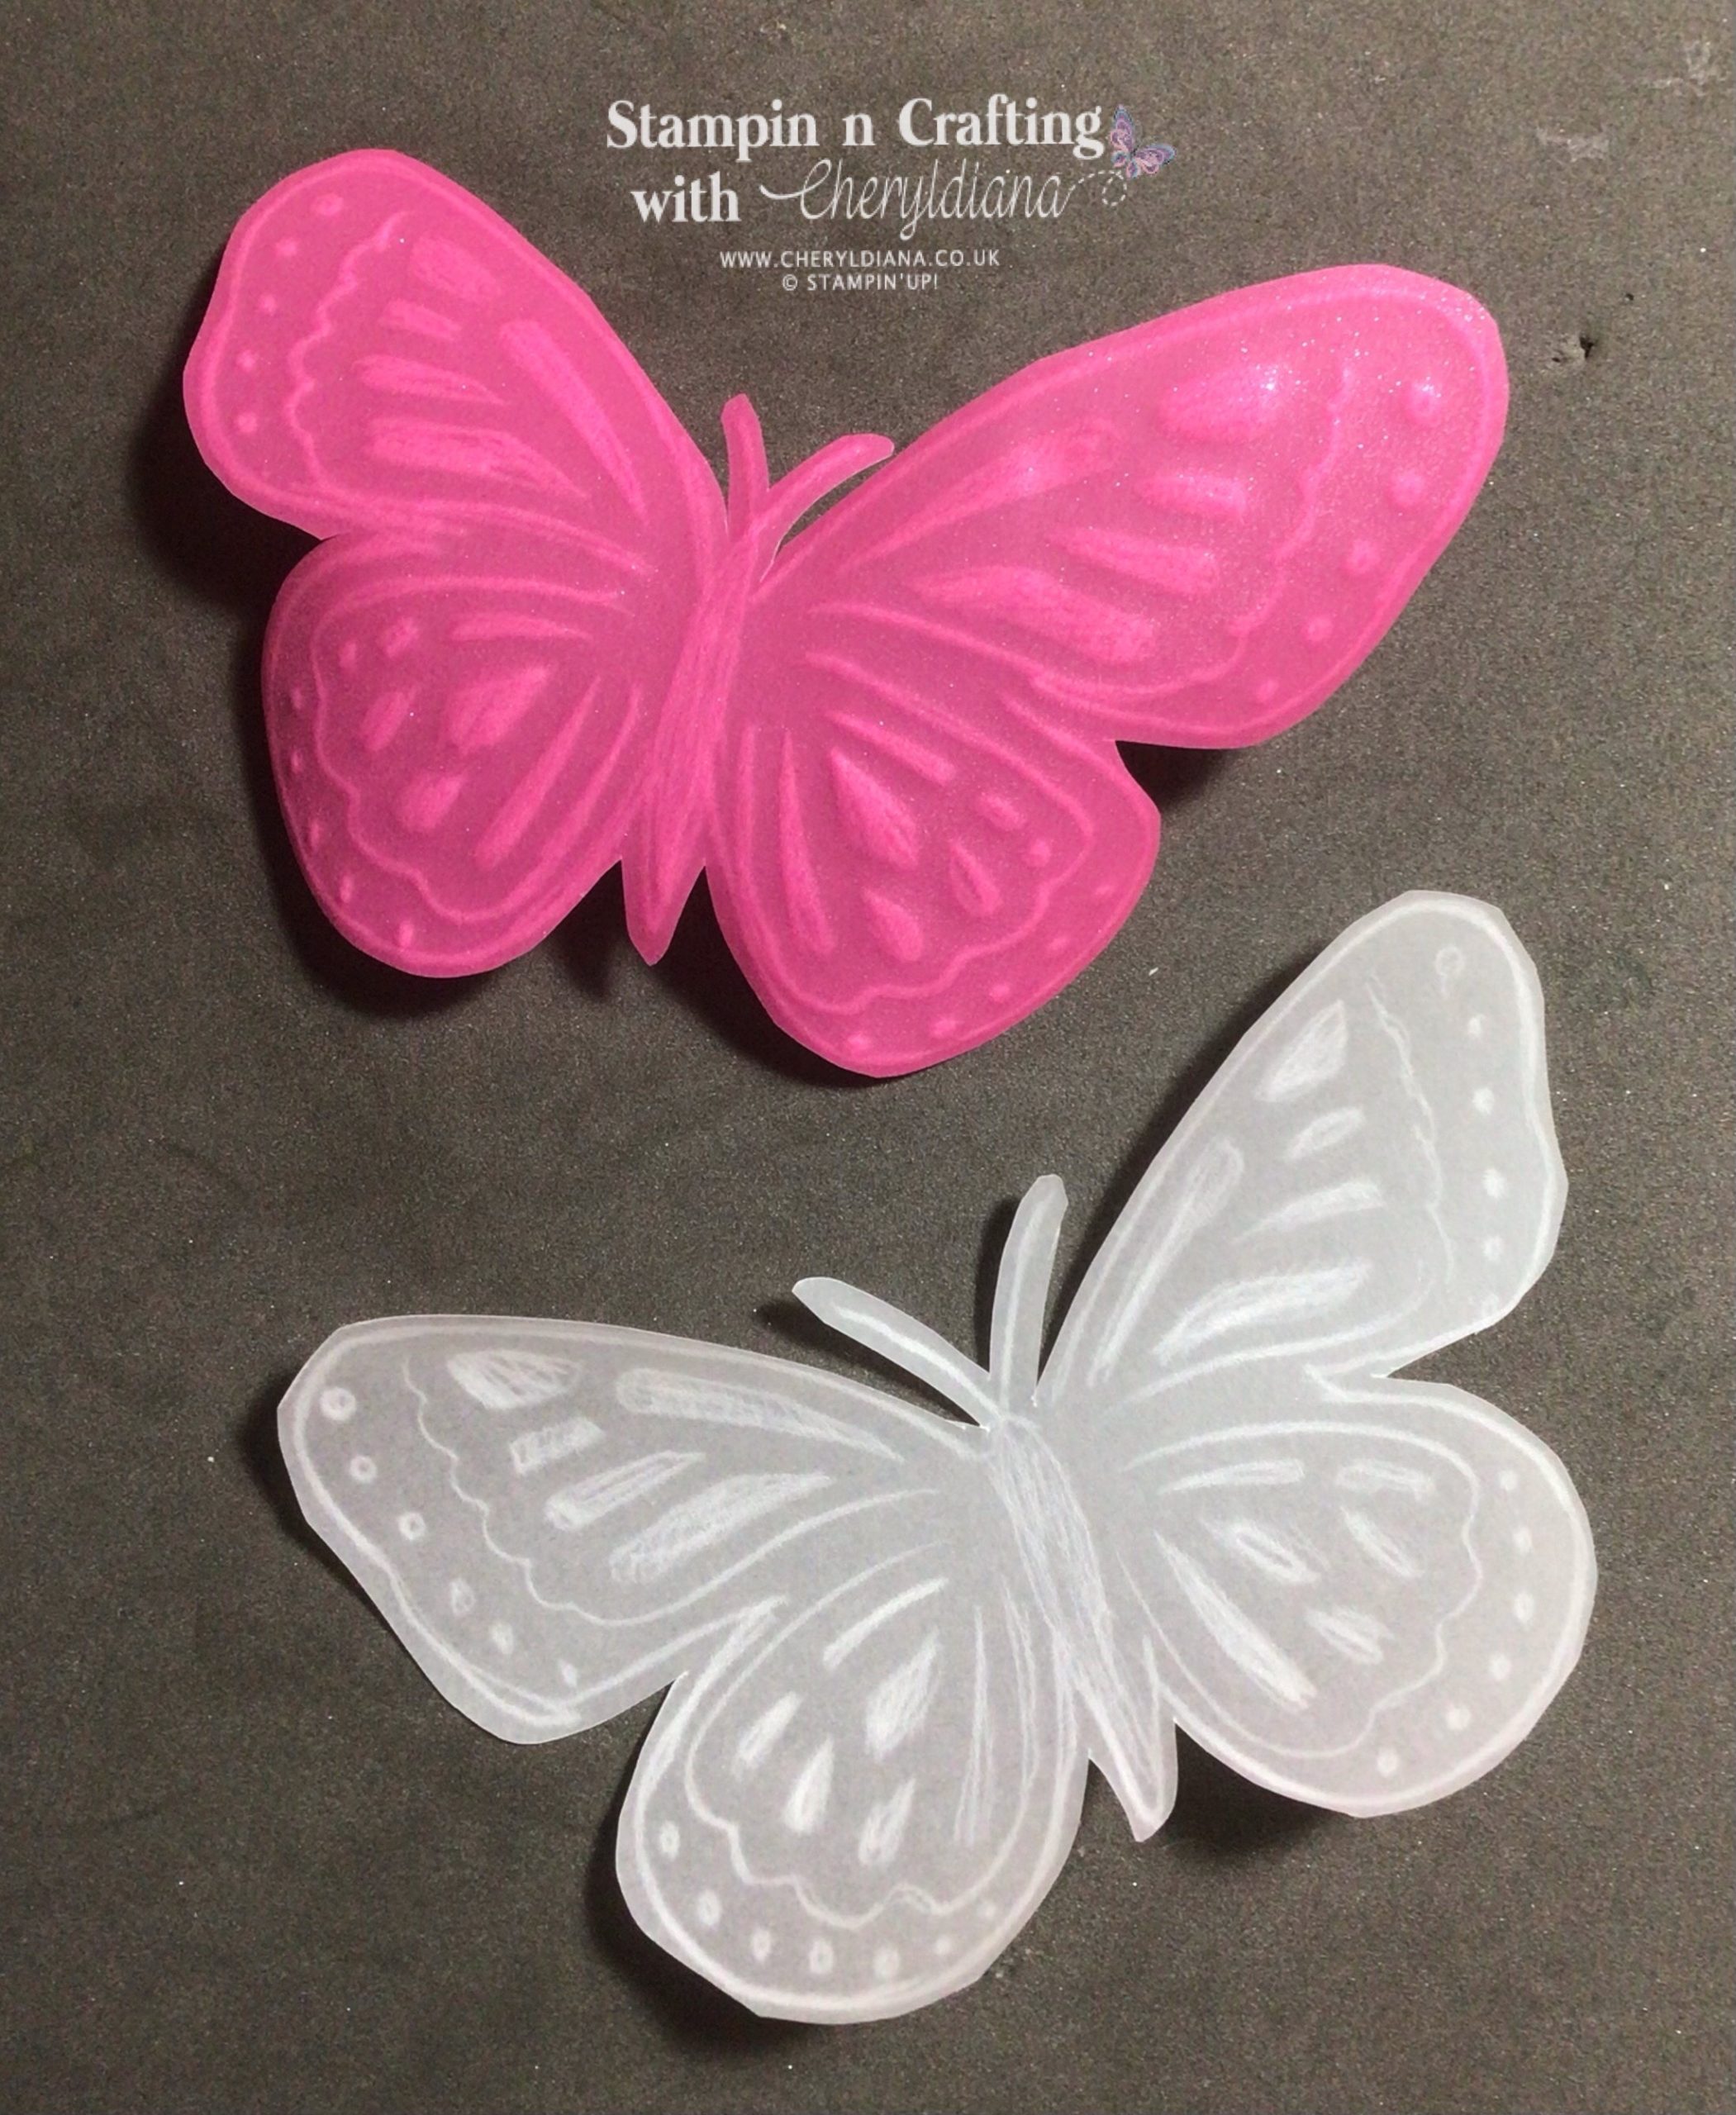
First I decided to use Vellum A4 card stock and the butterfly mask from the Butterflies & Flowers Layering Decorative Masks. I ten decided to use the Pick a Tool with the ball end attached. I started off by drawing round the outline of the butterfly and then filling in the detail. But I found that trying to line up the decorative part inside the butterfly outline quite hard so I did the decorative butterfly first and then the outline.
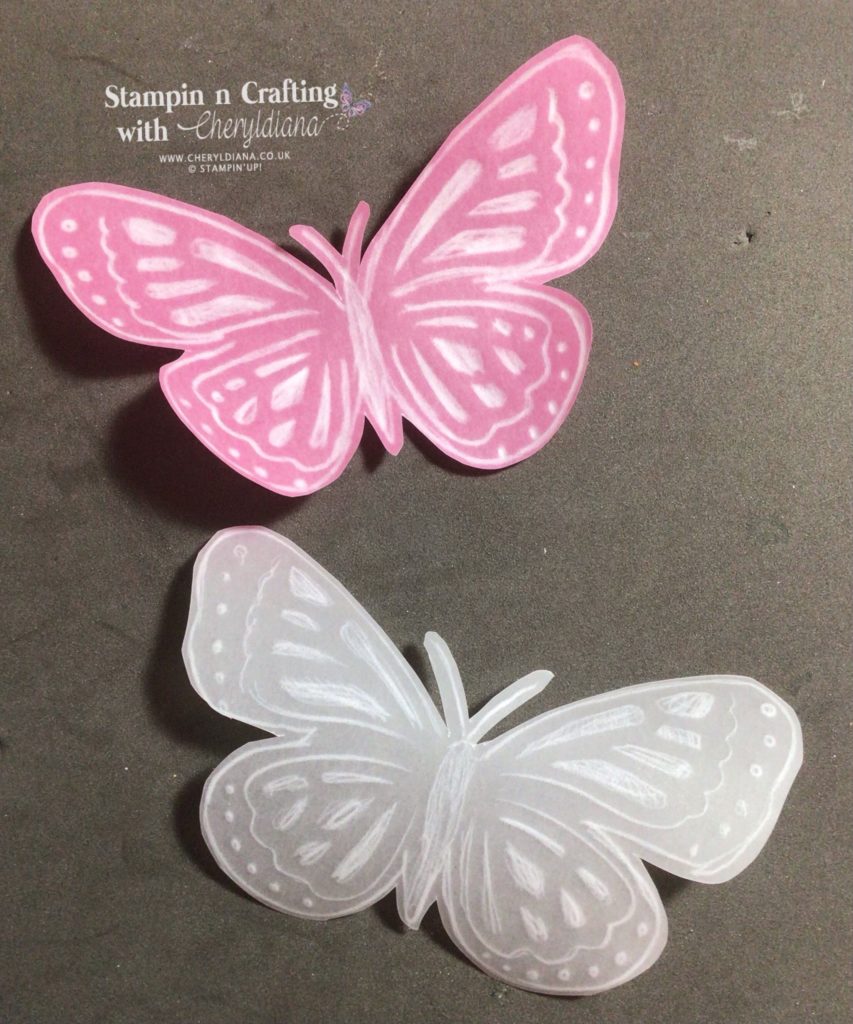
Once I have made two butterflies using White Vellum A4 card stock I decided to make another two using the Polished Pink Shimmer Vellum from the 2021-2023 In Colour Shimmer Vellum. I then cut them all out. I then had a choice of which side of each butterfly to use.
Next I tried to die cut some butterflies out using the individual butterfly dies from the Brilliant Wings dies but only a couple actually worked out.
Making the Scrapbook layout using vellum butterflies
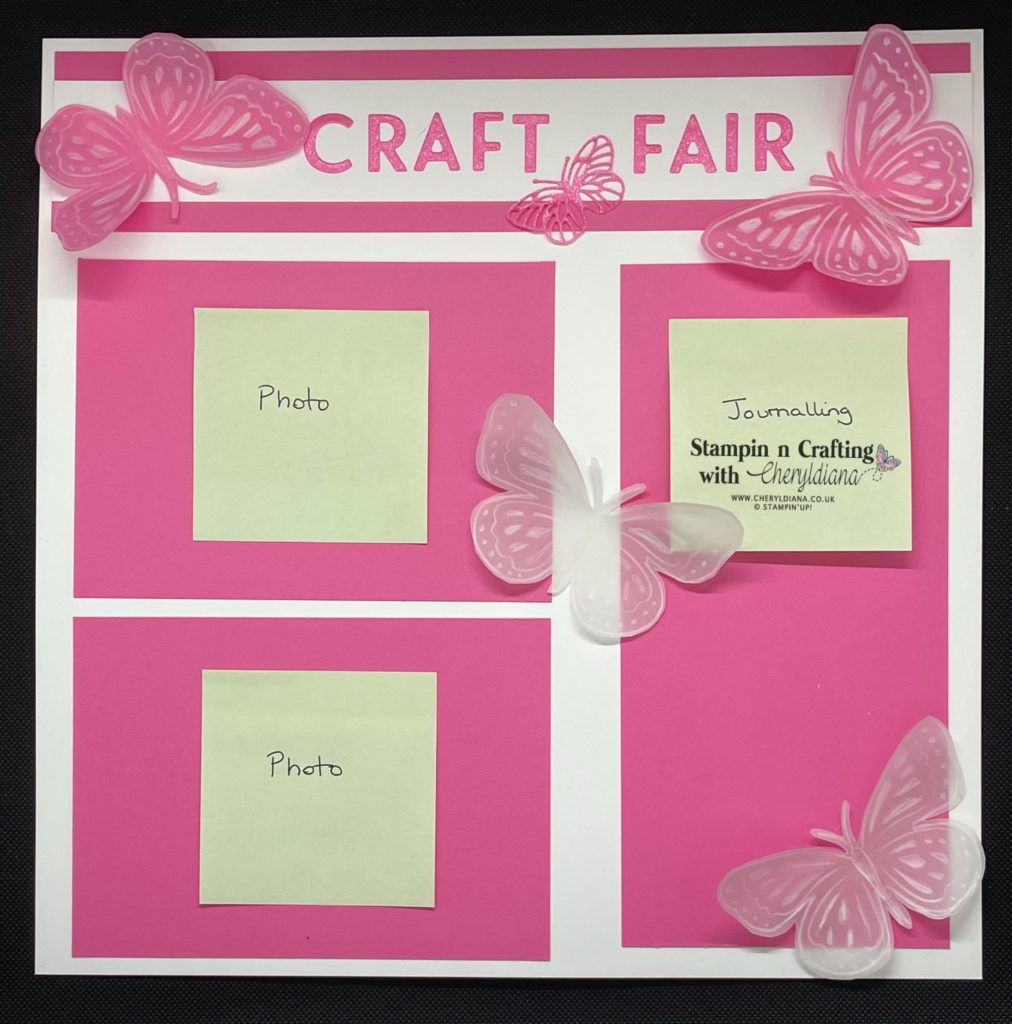
As my main logo colour is pink and I have a few craft shows coming up I thought I would design a scrapbook layout to show my craft stall and brand new logo tablecloth.
I started off with a 12×12 piece of Basic White card stock. Next I cut a 6cm strip of Polished Pink card stock for my title mat layer. I then cut a 4cm strip from A4 Basic White card stock to add my title to. I then cut 2 15.5cm x 11cm pieces of Polished Pink card stock to make my photo mat layers. Finally I cut a piece of Polished Pink card stock for my journaling mat layer and stuck the mat layers onto the layout.
Next I die cut the title ‘Craft Fair’ using the Playful Alphabet dies and Polished Pink Shimmer vellum ensuring that the glitter side was on top. I then stuck the two Polished Pink butterflies onto my title strip and then stuck the letters between both butterflies.
Finally I stuck the two white butterflies and the die cut butterfly onto the scrapbook layout.
I hope you have enjoyed seeing how I made vellum butterflies for my scrapbook layout. Now I am all ready to take some photos of my craft stall with my new logo tablecloth.
Click Here for my Facebook Page.
Until next time, keep stampin n crafting,

Please click on the NEXT button to visit the wonderful Mai Chapelain and see how she has used vellum on her scrapbook layout. Please remember to leave comments as you visit each person. Thank you.









The Vellum butterflies turned out so well. Vellum is a tricky paper to work with. Dies can sometimes tear/rip. I’ve heard of a tip using wax paper on top of the vellum before die cutting to avoid tearing. I personally have not tried it to know if it works.
Thanks for sharing your process! Good luck at the craft fair!
What a creative way to use the stencils! I love it.
Those butterflies are GORGEOUS! Such a fabulous page!
These vellum butterflies are so clever. THankyou for showing this amazing technique!!