Welcome to this month’s Stamptastic Friends Blog Hop.
This Month’s Theme is a Fun Fold Card.
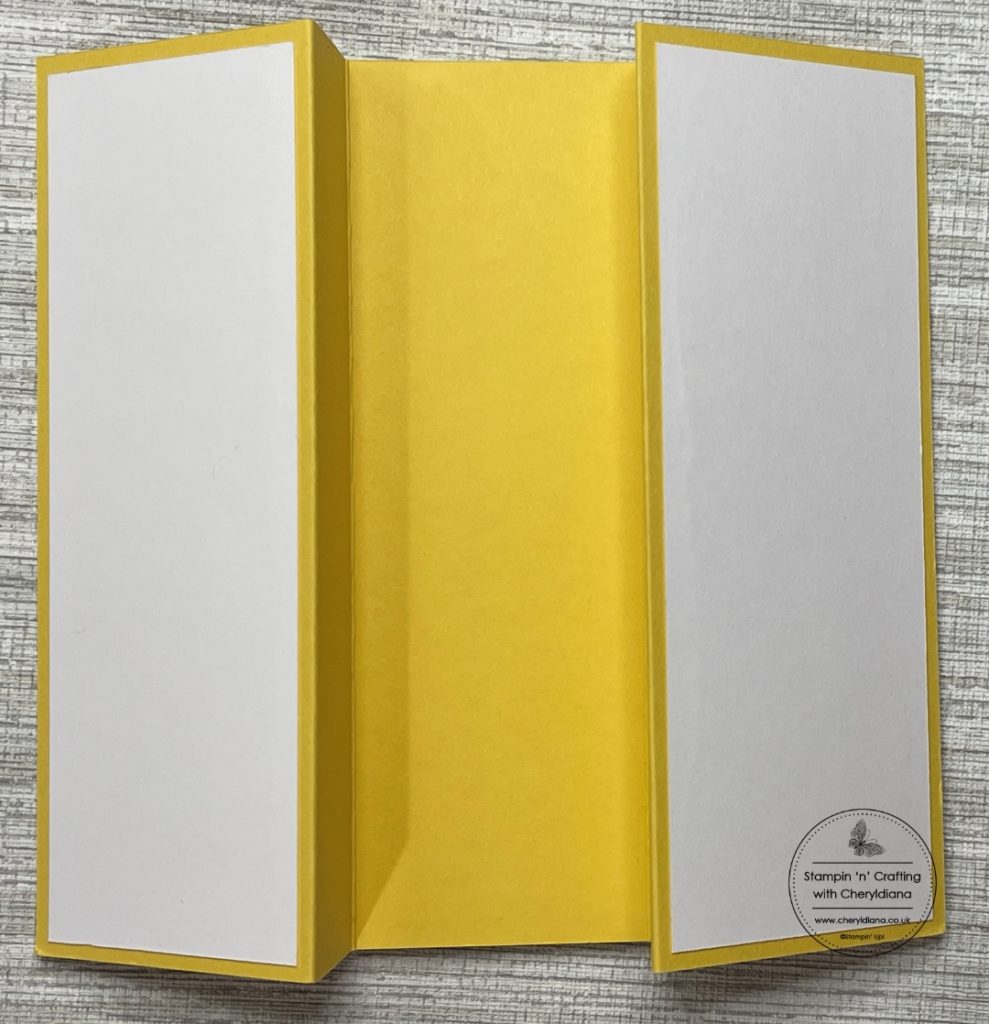
This month I am going to show you how to make a Stand Up fun fold card. I first taught this card in one of my Face to Face classes a year or so ago and it went down a storm as you can use so many different designer series papers to make each one different.
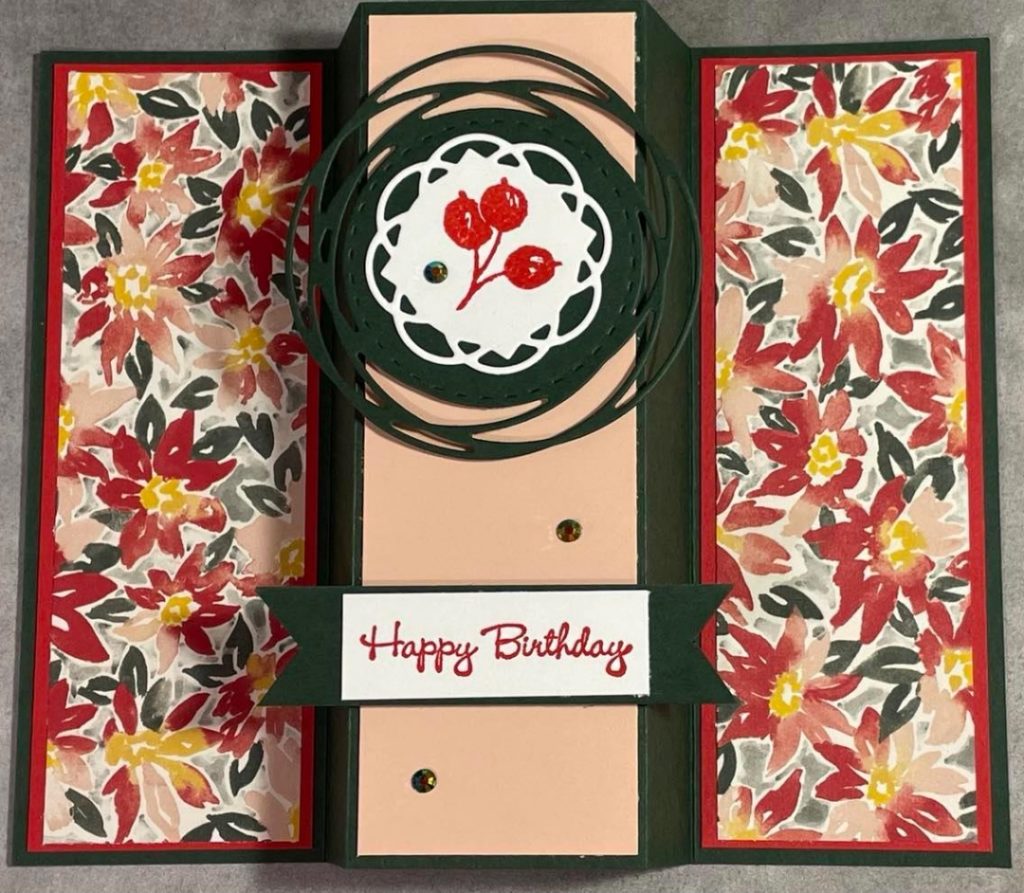
As you can see each one looks different depending on which designer series papers you use.
How to make a Stand Up Fun Fold Card
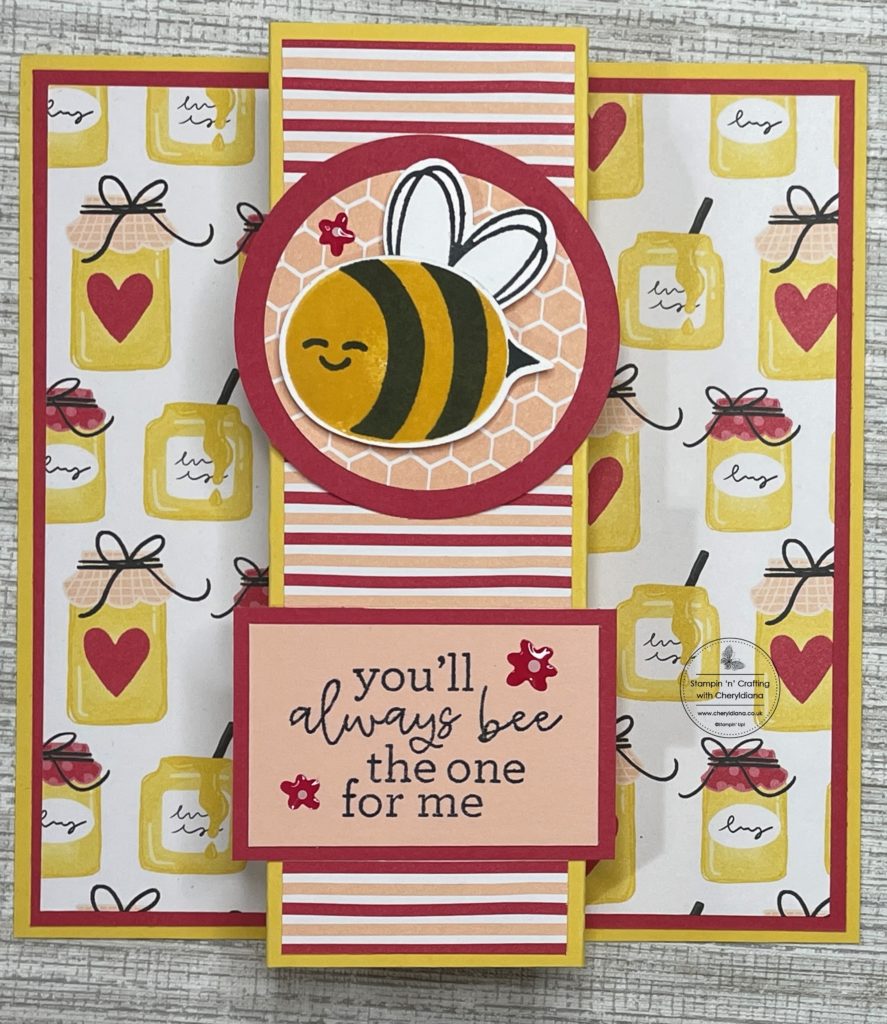
First of all I cut my piece of Daffodil Delight card stock in half along the long edge. Then with the longer edge at the top of the trimmer I scored it at 5.5cm and 8cm. Next I turned the card stock 180 degrees and scored again at 5.5cm and 8cm. I then cut my mat layers using Sweet Sorbet card stock and Bee Mine designer series papers. Which I then stuck onto the card front.
How to make the Bee topper for my Stand Up Fun Fold Card.
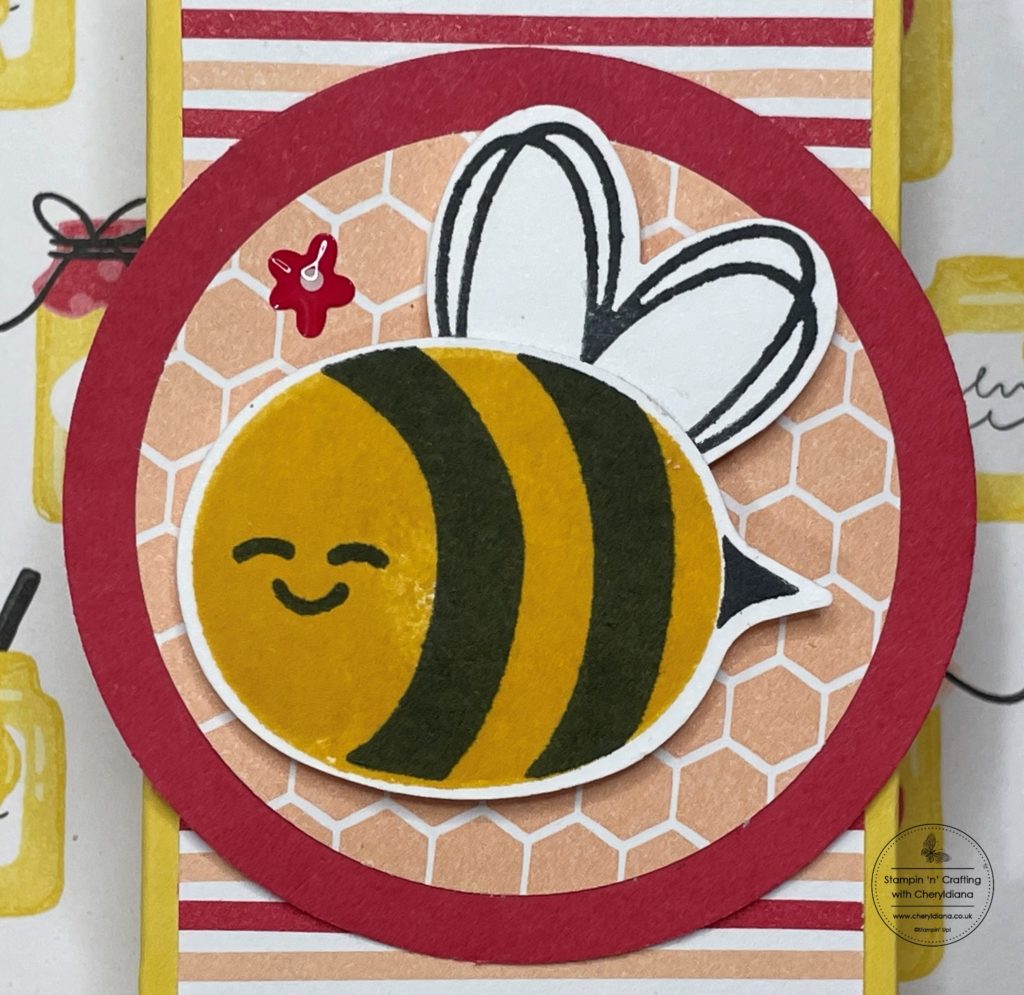
First of all I punched out a circle out of Sweet Sorbet card stock using the circle punch and another circle from the honey comb designer series paper using the smaller circle punch. I then stuck these on top of each other. After that I stamped the bumble bee body onto Basic White using Daffodil Delight ink and Memento Black ink. I then stamped his face again using Black Memento ink before punching out using the Bee Builder punch. Next I stamped some wings onto Basic White card stock using Black Memento ink again and punched it out. I stuck the wings onto the underneath of his body before adding the bee to the card front using Stampin’ Dimensionals.
How I finished my Stand Up Fun Fold Card.
I stuck two Basic White mat layers onto the back flaps to write on.
For the sentiment I stamped ‘You’ll always bee the one for me’ onto Petal Pink card stock using Black Memento ink. I then cut a mat layer using Sweet Sorbet card stock and stuck the sentiment onto it. Finally I added the sentiment to the card front using Stampin’ Dimensionals. Lastly I added three Sweet Sorbet flowers from the Adhesive Backed Hearts and Flowers.
I do hope you have enjoyed seeing how I made this Stand Up Fun Fold Card and how by using different designer series papers you can have a totally different look.
Of course I would love to see what you make so please do pop a picture onto my Facebook page.
Click Here for my Facebook Page.
Until next time, keep stampin n crafting,

PLEASE NOTE: Due to a recent change in my Demonstratorship, the Product List links may no longer take you directly to the correct products. If you would like to view a product in more detail or place an order, please use the Shop Button below.
Please click on the names below to visit each website and see what lovely projects the others have designed for their Fun Fold Blog Hop. Please do leave comments as you visit each one. Thank you.
Blog Hop List
Product List
")

 Designer Series Paper")
")


FREE TUTORIAL WITH EVERY ORDER
When shopping through my Stampin’ Up! online shop, you will receive an FREE TUTORIAL of 6 simple card ideas. Learn more!
Spend over £45 (before postage and packing) and also receive another FREE Tutorial with 14 more detailed tutorials. Learn more!
Wish to Order. Click here to shop
Thank you for shopping with me!
Remember for every order over £20.00 you will receive 10% rewards to use on your next order.
- Why not subscribe to Paper Pumpkin and get a different surprise kit each month through the post. The monthly subscription price also includes postage.
- For beginner crafters, crafting on the move or as a gift then have a look at our Kits Collection. Each month there are two NEW Kits to choose from.
- For even more options on top of what is in the catalogue have a look at the Online Exclusive selection.

I am an Independent Stampin’ Up! demonstrator for the UK, Ireland, France, Belgium, The Netherlands, Germany and Austria.
Postage is a flat rate of £6.95 / €7.95. Shop for your Stampin’ Up! products here.
Do you need any help?
If you have any questions or need any help with an order then please email me.
Join my Team with a Starter Kit
I would love you to join my team of A Kaleidoscope of Stampers. We are a wonderful, friendly group of crafters who love getting discounts on our hobby or even run a part time or full time business sharing Stampin’ Up! products.
You can find out more here or join straight away.


I love this fold! Going to have to try it tonight!!
Great fun fold, will have to give this a go. Love this suite! x
You’ve used one of current favourite product suites for your fun fold today Cheryl – the Bee Mine suite is sooooo cute !