Welcome to this month’s Stamptastic Friends Blog Hop
This Month’s Theme is Christmas
It is that time of year when you start thinking about Christmas and making cards and sorting out how you are going to make giving a gift card different each year.
I attended a Zoom session with other demonstrators where we did a mystery stamper project designed by the lovely Louise Sims. We were given the measurements of card stock and Designer Series Paper and then taught how to make the card. I then made the card again for my recent Christmas workshop where we used the Trimming The Tree stamp set and Tree Trimmings Dies to make a variety of Christmas cards.
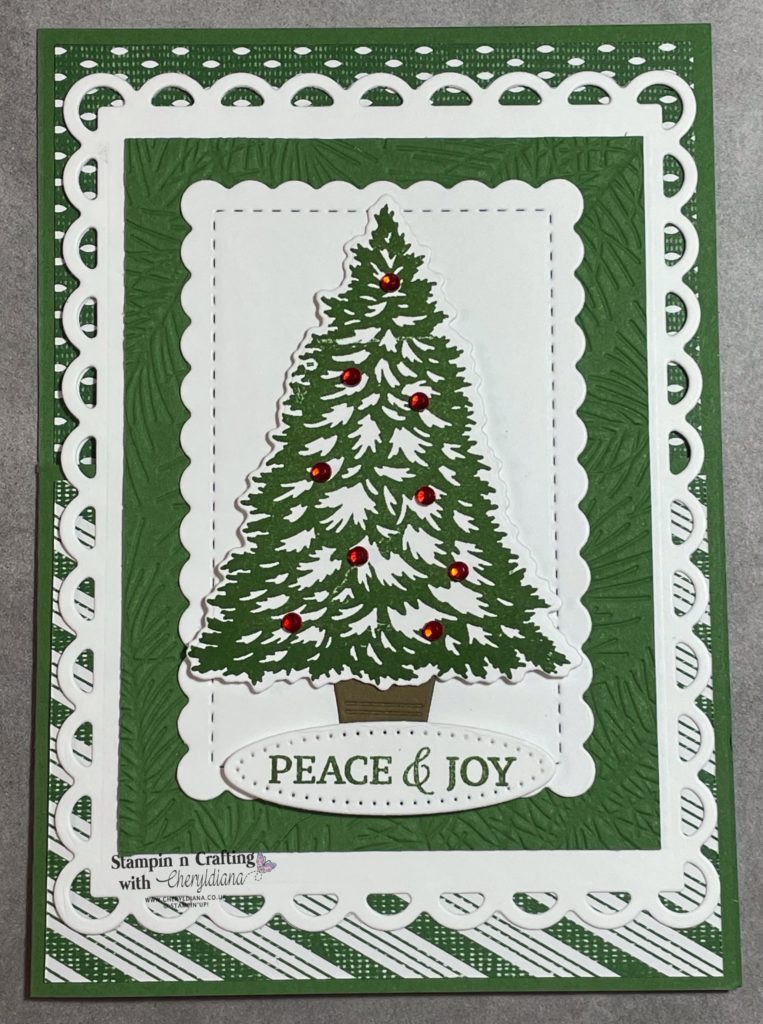
How I made the Christmas card with Gift Card holder
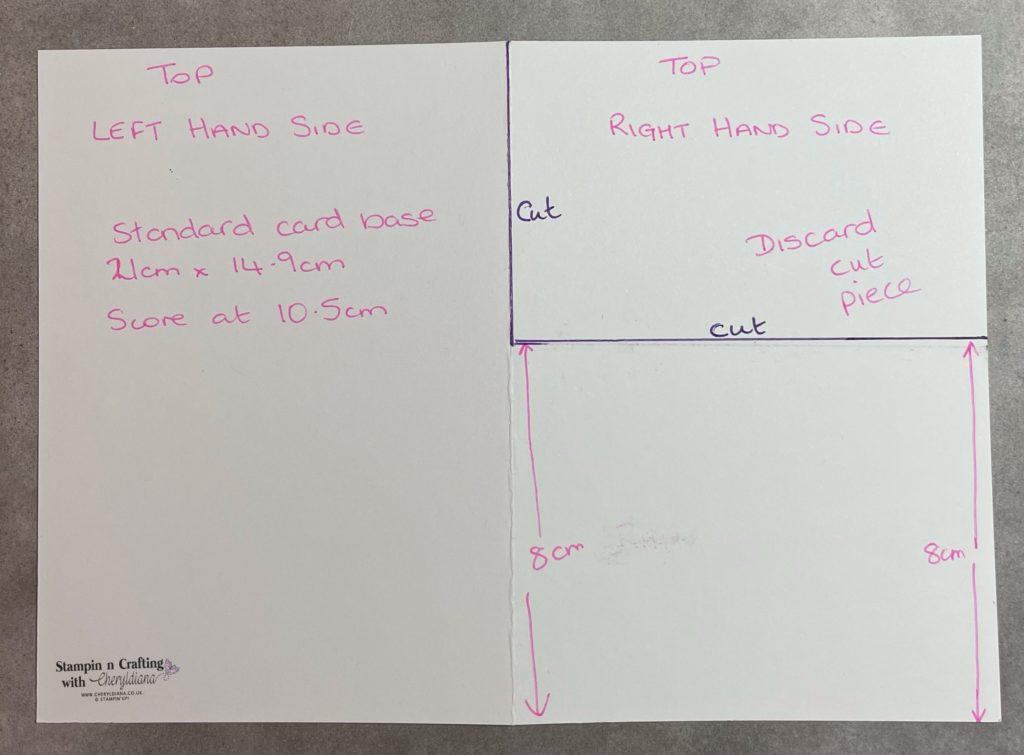
I started with an A4 piece of Garden Green card stock and made a basic portrait card base. Then I cut a piece out of the right hand side as shown in the template below.
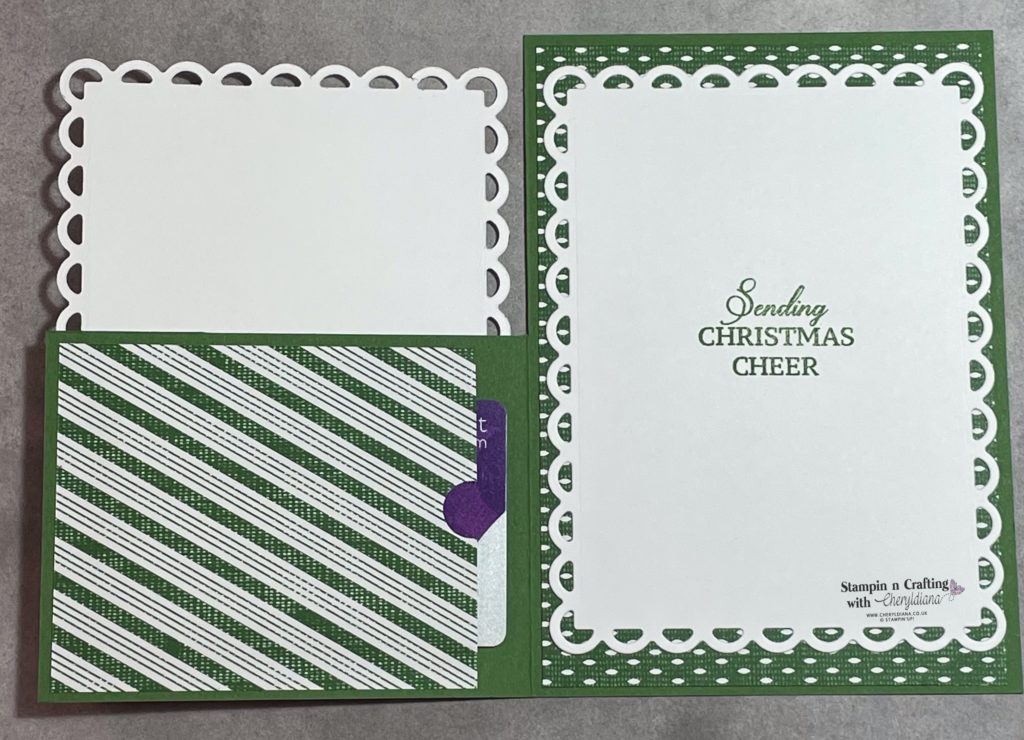
I then cut a 10cm x 14.4cm piece of Designer Series Paper another mat and stuck this to the inside of the card base. Next I cut a 10cm x 7.5cm piece of matching Designer Series Paper and stuck this to the front of the card. I then cut a 9cm x 7.5cm piece using the same Designer Series Paper. I used the 1/2″ circle punch to cut out a slot so that you can add and remove a gift card. Then I stuck this piece of Designer Series Paper to the inside of the card using Multi Purpose Glue.
How I made the front panel of my Christmas Card with Gift Card holder
Next I die cut two Basic White mat layer using the largest scalloped die and one Basic White mat layer using the middle scalloped die from the Contours dies. I stuck one of the larger scalloped mat layers to the front of the card before I stuck the other to the inside of the card. Next I cut a 8cm x 11cm piece of Garden Green card stock to make a mat layer and embossed it using the Christmas Tree Branches from teh Wintry 3D Embossing Folder. I then stuck this to the smaller scalloped mat layer.
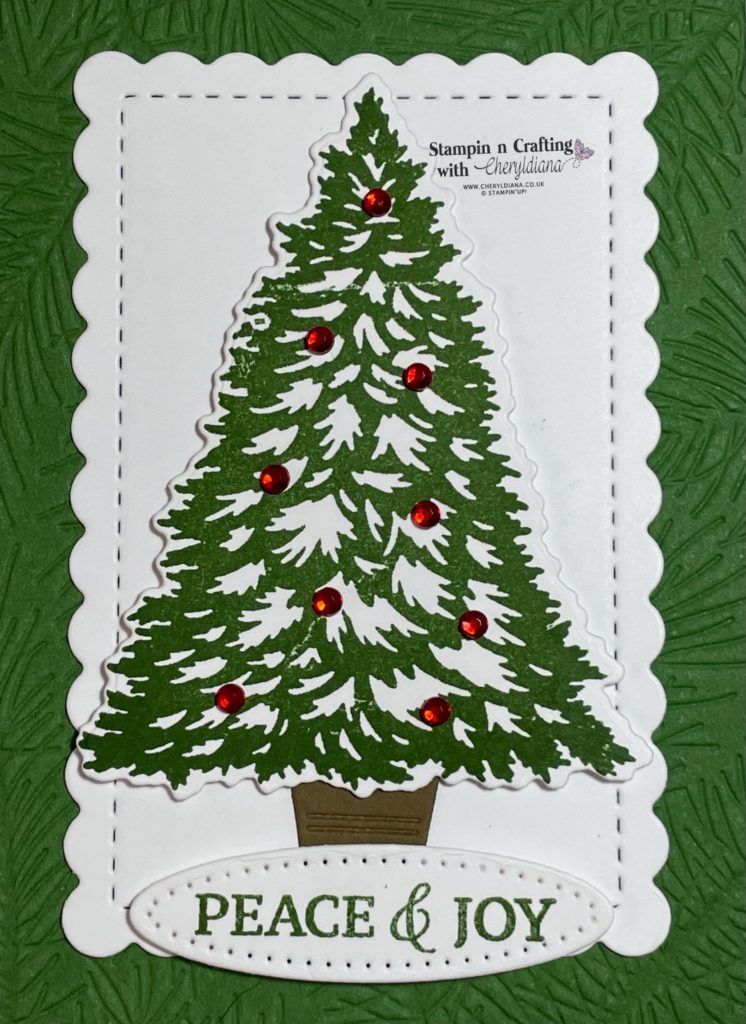
Next I stamped the large Tree image from the Trimming The Tree stamp set. Then I die cut it out using the Tree Trimmings Dies that were available for the month of September 2022 but you could cut the image out using Paper Snips. I then die cut the pot using Soft Suede card stock and stuck it to the bottom of the smaller Basic White scalloped mat layer. Next I stuck the die cut tree onto the Basic White mat layer using Stampin’ Dimensionals.
How I finished off the Christmas Card with Gift Card holder.
I then die cut a scrap of Basic White card stock using the small oval die from Tree Trimmings Dies. I then stamped the Peace & Joy image using Garden Green ink and added tot he card front. To finish off I added some Red Rhinestone Basic Jewels to the tree.
I hope you have enjoyed seeing my Christmas Card with Gift Card holder. I will definitely be making some more of these cards both as leaving gifts and for Birthday’s. Please do go away and have a go at making this type of card and please do share it onto my Facebook page.
Click Here for my Facebook Page.
Until next time, keep stampin n crafting,

Blog Hop List
Product List
FREE TUTORIAL WITH EVERY ORDER
When shopping through my Stampin’ Up! online shop, you will receive an FREE TUTORIAL of 6 simple card ideas. Learn more!

Spend over £45 (before postage and packing) and also receive another FREE Tutorial with 14 more detailed giftable ideas. Learn more!

Wish to Order. Click here to shop
Thank you for shopping with me!
Remember for every order over £20.00 you will receive 10% rewards to use on your next order.
- Why not grab a bargain at the Last Chance Products – Save up to 60% ‘whilst stocks last’.
- For beginner crafters, crafting on the move or as a gift then have a look at our Kits Collection. Each month there are two NEW Kits to choose from.
- For even more options on top of what is in the catalogue have a look at the Online Exclusive selection.

I am an Independent Stampin’ Up! demonstrator for the UK, Ireland, France, Belgium, The Netherlands, Germany and Austria.
Postage is a flat rate of £6.95 / €7.95. Shop for your Stampin’ Up! products here.
Do you need any help?
If you have any questions or need any help with an order then please email me.
Join my Team with a Starter Kit
I would love you to join my team of A Kaleidoscope of Stampers. We are a wonderful, friendly group of crafters who love getting discounts on our hobby or even run a part time or full time business sharing Stampin’ Up! products.
You can find out more here or join straight away.








What a fabulous way to give a gift card! Love it and your design x
Love this fold. And your card is beautiful.
Great little project Cheryl – the hidden gift card holder is so clever !
What a lovely Christmas card Cheryl, and interesting to see the fold too. I hadn’t noticed on first glance!