An Adorable Storybook 2 page Scrapbook Layout to record my visit to Beatrix Potter’s home.
I have decided to show you have I made this adorable Storybook 2 page scrapbook layout so that I could record my visit to Beatrix Potter’s home where she wrote her famous Peter Rabbit story books.
In 2012 my husband and I went to the Lake District on holiday and whilst there we had to visit Beatrix Potter’s home I had been reading her Peter Rabbit books since I was a small child and then with my children and now with my grandchildren. I loved and still do love the illustrations as well as the tales of all the animals.
When I saw the Storybook Scrapbook Workshop Kit and the Designer Series Papers they reminded me of Beatrix Potter and her characters. I knew that I had to record my visit to her home using these products.
How I made my Adorable Storybook 2 page Scrapbook Layout
First I decided that I wanted to make a vegetable garden so I chose to tear 4 strips off a 12″x12″ sheet of Old Olive Two-Tone card stock. I then stuck 2 of the strips together turning one over so that I got both sides of the Two Tone. I only put glue onto the sides and bottom of the top strip before sticking both onto the bottom of each scrapbook layout.
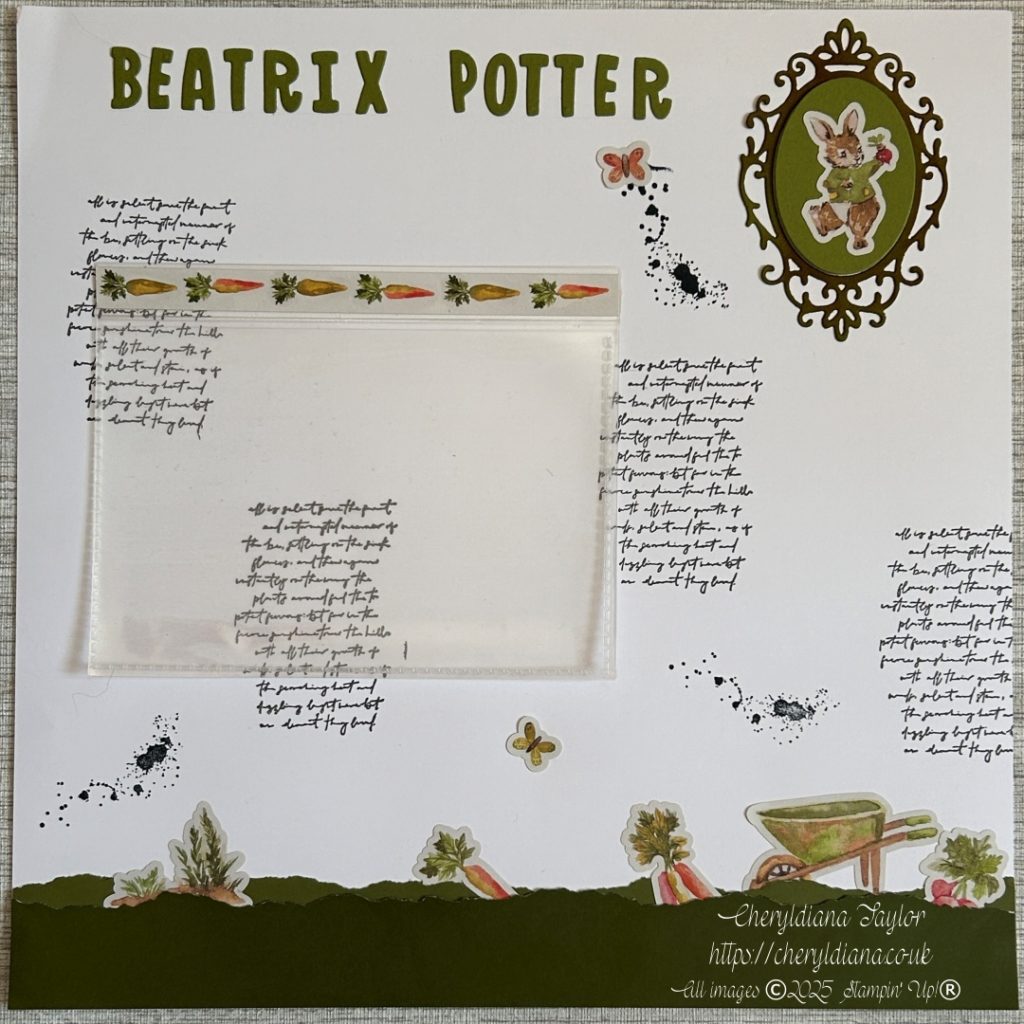
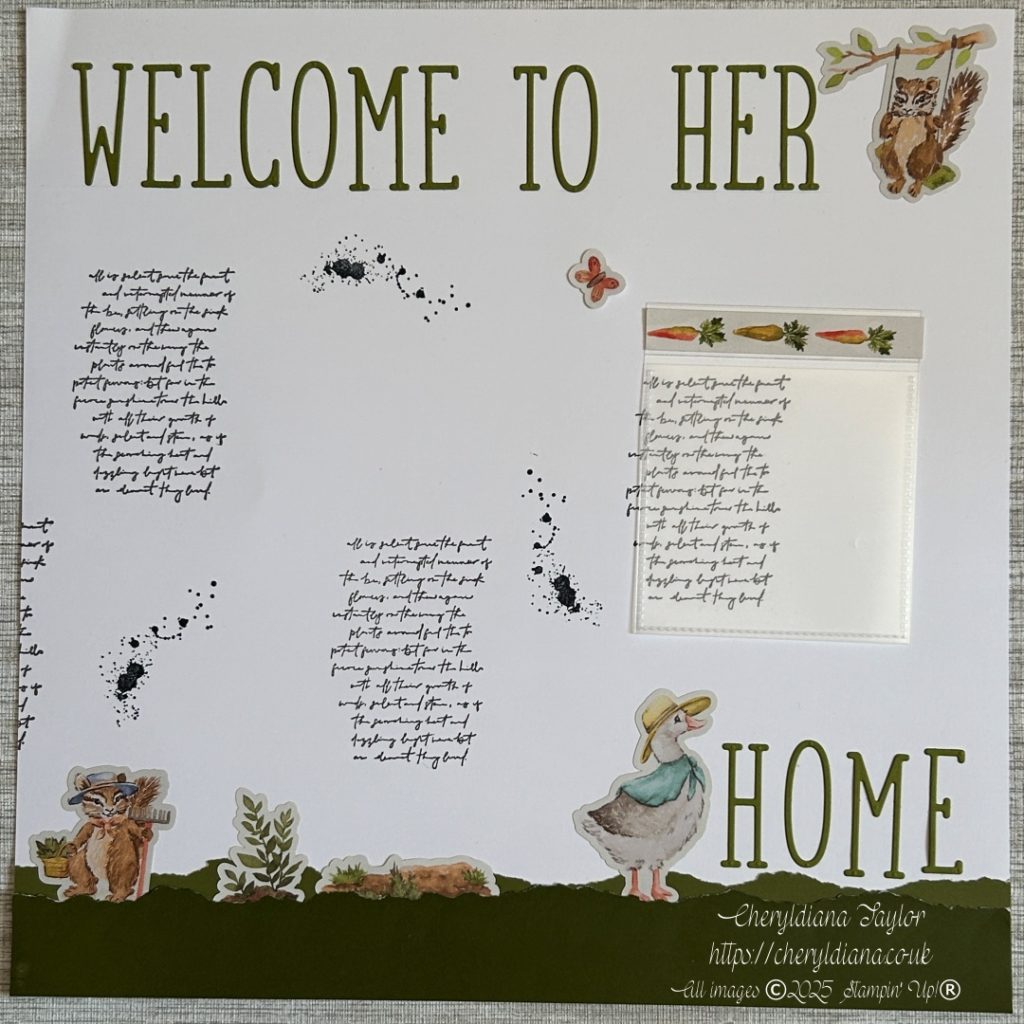
Now I needed to make my titles. I chose to use the Mini Alphabet Dies for my first page and die cut out the letters for ‘Beatrix Potter’ using Old Olive card stock. I stuck these to the top of my first page. I then decided to use the Alphabet A La Mode dies to die cut out the rest of my title ‘ Welcome To Her Home’ again using Old Olive card stock. I did remember to add some of the Adhesive Sheet to the back of the card stock before I die cut the letters.
As my adorable storybook 2 page scrapbook layout is about an author I decided to use the Elements of Text stamps for my background stamping. I chose the longer thin text and stamped it onto the background using Black Memento ink. I then decided to add some of the ink splodges as then Beatrix wrote her books she would have used an ink pen and and ink pot which would have made splodges over her pages.
How I made the frame on page 1 of my Adorable Storybook 2 page Scrapbook Layout
I decided that I wanted to have a rabbit after the Beatrix Potter title so I die cut out the oval frame from the Storybook Dies again using Old Olive card stock. I wanted to give an antique feel to it so I used Wild Wheat and Pecan Pie to blend colour over the frame. I had forgotten to put some Adhesive Sheet onto the card stock before I die cut it out so I had to carefully apply some glue to the back of the frame to stick it to the top right-hand corner of the first page.
I then used Stampin’ Dimensionals to stick the middle of the frame and added the rabbit holding a radish on top.
I then chose which die cuts I wanted to add to my vegetable garden. As I had not stuck the top of my first strip I was able to slot them just behind the top strip so it looks like the vegetables are poking out of the ground. I then added three 6″ x 4″ Flip Flaps. These are the first time I have seen and used them and I must say they are amazing.
How I made the frame on page 2 of my Adorable Storybook 2 page Scrapbook Layout
For my second page I again added some of the pre-cut die cuts to the vegetable garden. I then added the large duck and the squirrel on a swing to my layout. I then added two 3″ x 3″ Flip Flaps for my journaling which I will do later.
Finally I added part of the sticky carrot strip to hide the flip flap glue strip.
I absolutely love my adorable storybook 2 page scrapbook layout and I had so much fun making it and deciding which animals I wanted to use.
I hope that you have enjoyed seeing how I made this two page layout. It was so simple to actually do so why not have a go at making your own. You could just make one page and pop it into a box frame and put it on your wall. Please do share your makes onto my Facebook page as I would love to see them.
Click Here for my Facebook Page.
Until next time, keep stampin n crafting,

Please click on the names below to visit each website and see what lovely scrapbook layouts the others have designed for their Blog Hop. Please do leave comments as you visit each one. Thank you..
Blog Hop List
Product List
")
 Two Tone Cardstock")
 Cardstock")

")

")


FREE TUTORIAL WITH EVERY ORDER
When shopping through my Stampin’ Up! online shop, you will receive an FREE TUTORIAL of 5 simple card ideas. Learn more!

Spend over £45 (before postage and packing) and also receive another FREE Tutorial with 15 more detailed giftable ideas. Learn more!
Wish to Order. Click here to shop
Thank you for shopping with me!
Remember for every order over £20.00 you will receive 10% rewards to use on your next order.
- Why not subscribe to Paper Pumpkin and get a different surprise kit each month through the post. The monthly subscription price also includes postage.
- For beginner crafters, crafting on the move or as a gift then have a look at our Kits Collection. Each month there are two NEW Kits to choose from.
- For even more options on top of what is in the catalogue have a look at the Online Exclusive selection.

I am an Independent Stampin’ Up! demonstrator for the UK, Ireland, France, Belgium, The Netherlands, Germany and Austria.
Postage is a flat rate of £6.95 / €7.95. Shop for your Stampin’ Up! products here.
Do you need any help?
If you have any questions or need any help with an order then please email me.
Join my Team with a Starter Kit
I would love you to join my team of A Kaleidoscope of Stampers. We are a wonderful, friendly group of crafters who love getting discounts on our hobby or even run a part time or full time business sharing Stampin’ Up! products.
You can find out more here or join straight away.


Love the double torn edges for the garden!! What a brilliant idea!! And the super cute carrot borders for the photos are just fabulous!!
I love the way the vegetables are popping out of the ‘ground’ Cheryl
Love all the textures in your layout, with the torn papers and inking. Love Beatrix Potter stories