Welcome to this month’s Stamptastic Friends Blog Hop.
This Month’s Theme is: 3D Item.
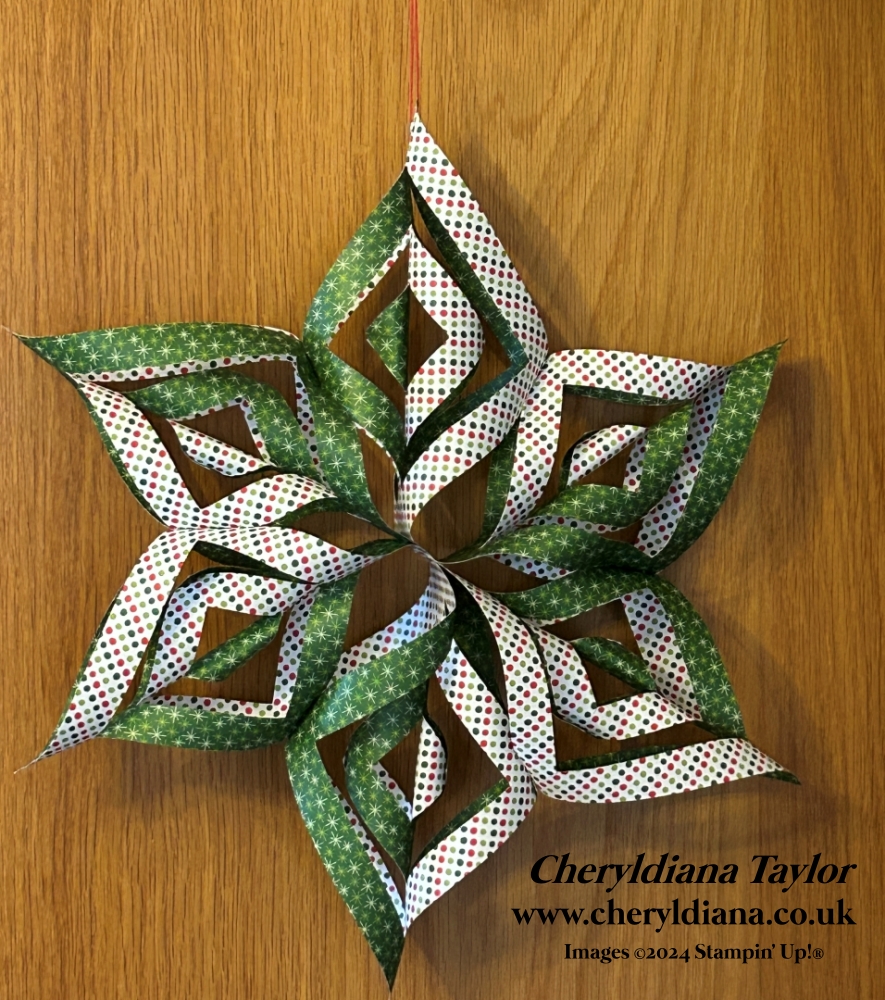
I decided to show you how to make a Christmas Window Star Decoration using the Take a Bow designer series papers. I last make one of these before I became a Stampin’ Up! demonstrator. It looks complicated but it is really very simple to make.
How I made my Christmas Window Star Decoration.

I started by cutting a 15cm x 15cm piece of white card stock in half diagonally. I made 2 pencil lines 0.5cm either side of the middle. Next I made a mark at 2.5cm, 5cm and 7.5cm along the long edge starting from the pencil line. I then did the same again on the other side. This is then repeated along each of the middle line. (see template).
Next I cut along each of the lines as far as the middle lines to make a chevron pattern.
I then chose 6 pieces of 6″x6″ papers and scored and folded them in half diagonally. (You could use any 12″x12″ paper and cut into 6″ squares). Next I clipped the template onto one of the folded triangles with the fold at the bottom before cutting along each cut line on the template. This was repeated on each of the other 5 pieces of paper.
How to make up each part of the Christmas Window Star Decoration.
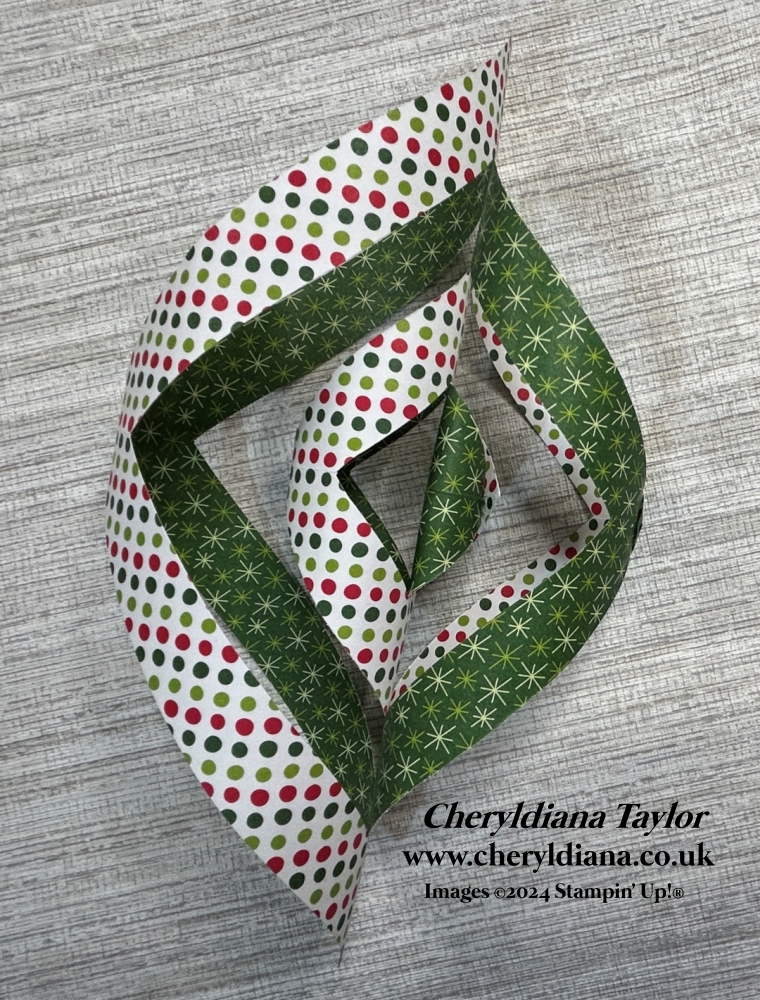
I carefully unfolded each piece of designer series paper. I then took the smallest triangles from the middle of the paper and stuck the points together using a glue dot. Next I turned the paper over and stuck the points of the next triangle together. I repeated this for each section of of the square remembering to turn the paper over each time. I then continued to make up each part of the Christmas window star decoration until all 6 pieces of paper had been used.
How to build the Christmas Window Star Decoration.
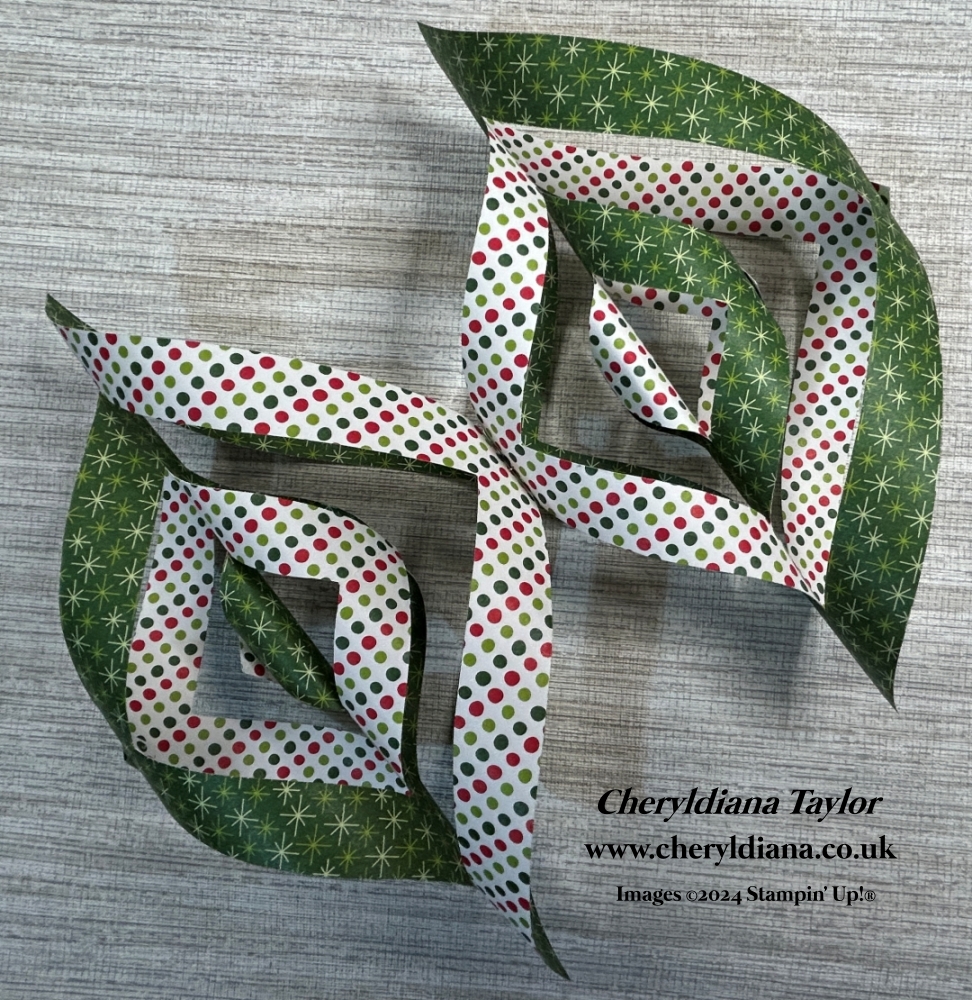
I then took 2 of the pieces and holding the larger side of one against the smaller side of the other I stapled them together at the centre where both pieces met. I then added a third piece in the same way and then I stapled them all together at one end. This makes up half of the Christmas window star decoration.
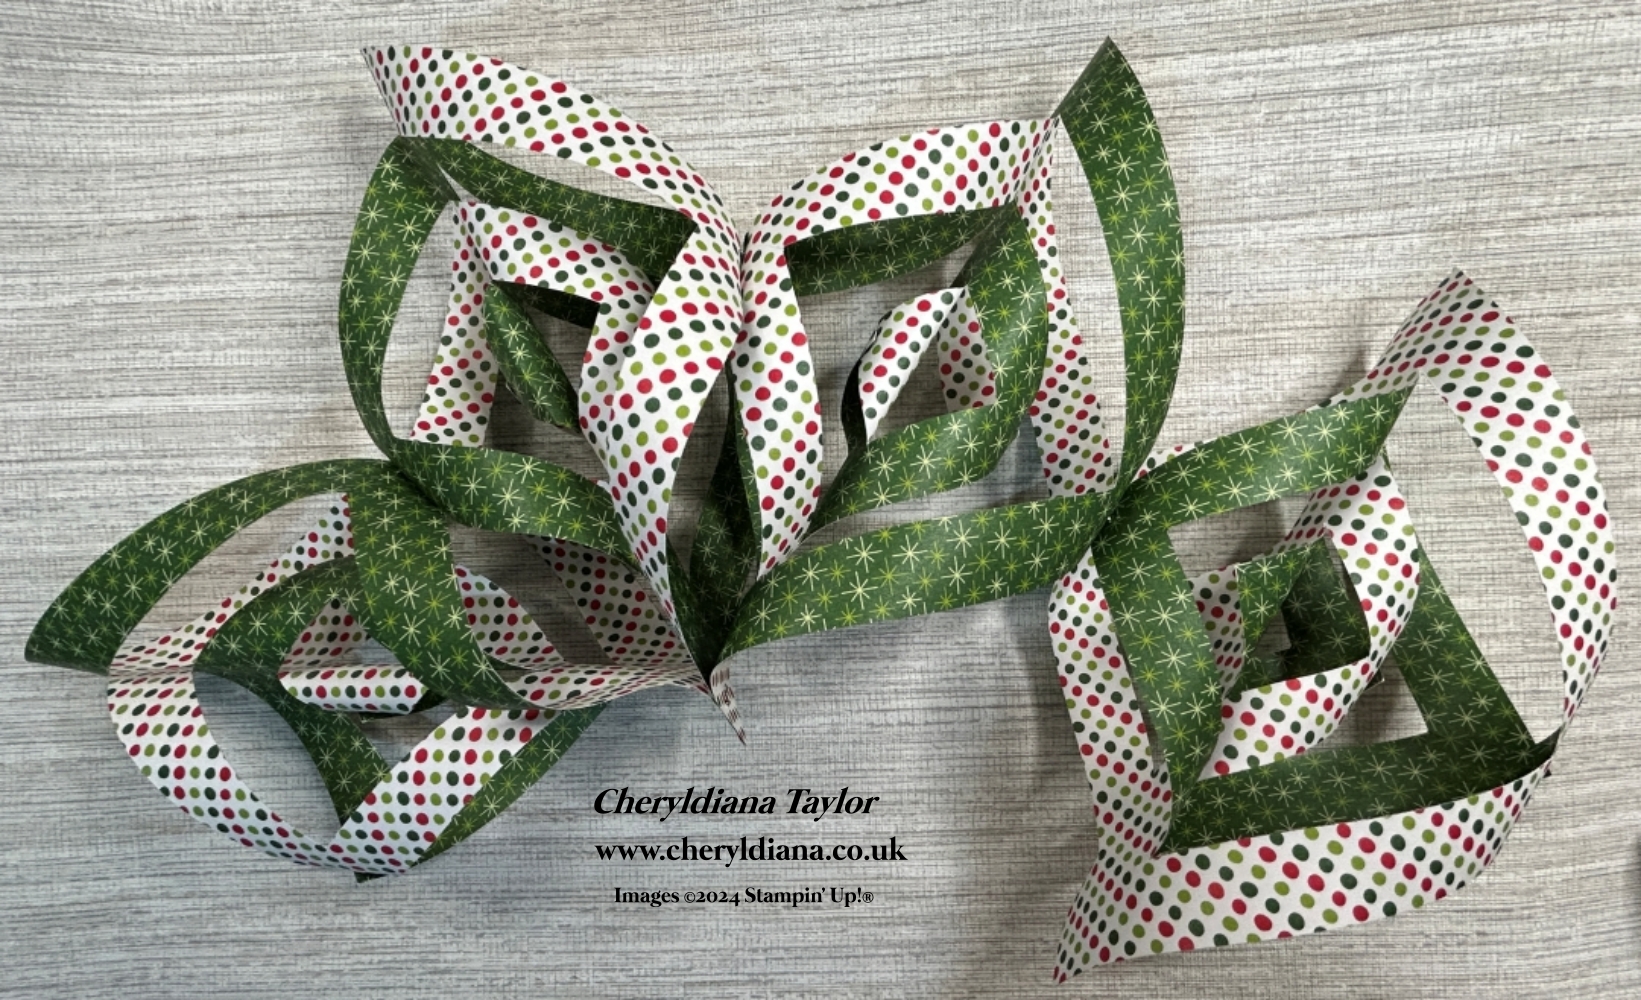
I then repeated this adding the last 3 pieces. Then I stapled them altogether at one end and at the centre where both pieces met. Next I punched a hole in the top of one piece and threaded some bakers twine through it to enable the Christmas window star decoration to be hung up.
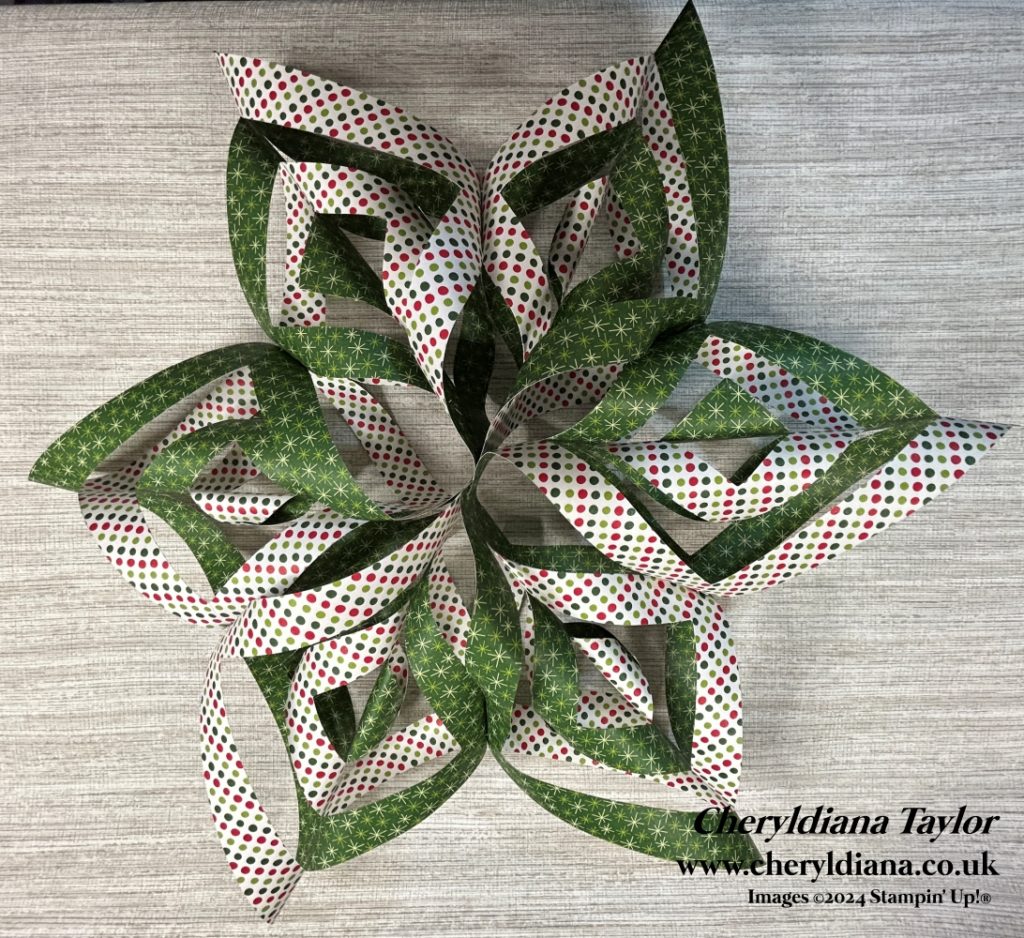
I am really pleased in how my Christmas window star decoration turned out. Why not have a go at making one yourself, Please do share what you make on my Facebook group.
Click Here for my Facebook Page.
Until next time, keep stampin n crafting,

Please click on the names below to visit each website and see what lovely projects the others have designed for their 3D Item Blog Hop. Please do leave comments as you visit each one. Thank you.
Blog Hop List
Product List
FREE TUTORIAL WITH EVERY ORDER
When shopping through my Stampin’ Up! online shop, you will receive an FREE TUTORIAL of 6 simple card ideas. Learn more!
Spend over £45 (before postage and packing) and also receive another FREE Tutorial with 14 more detailed giftable ideas. Learn more!

Wish to Order. Click here to shop
Thank you for shopping with me!
Remember for every order over £20.00 you will receive 10% rewards to use on your next order.
- Why not grab a bargain at the Last Chance Products – Save up to 60% ‘whilst stocks last’.
- For beginner crafters, crafting on the move or as a gift then have a look at our Kits Collection. Each month there are two NEW Kits to choose from.
- For even more options on top of what is in the catalogue have a look at the Online Exclusive selection.

I am an Independent Stampin’ Up! demonstrator for the UK, Ireland, France, Belgium, The Netherlands, Germany and Austria.
Postage is a flat rate of £6.95 / €7.95. Shop for your Stampin’ Up! products here.
Do you need any help?
If you have any questions or need any help with an order then please email me.
Join my Team with a Starter Kit
I would love you to join my team of A Kaleidoscope of Stampers. We are a wonderful, friendly group of crafters who love getting discounts on our hobby or even run a part time or full time business sharing Stampin’ Up! products.
You can find out more here or join straight away.







I love it Cheryl. I think I need to make one for Herbie and me
Wow! That’s fantastic! Will have to give this ago. Thanks x