
Welcome to this month’s Tech 4 Stampers Academy Blog Hop.
This month’s theme is: Birthdays
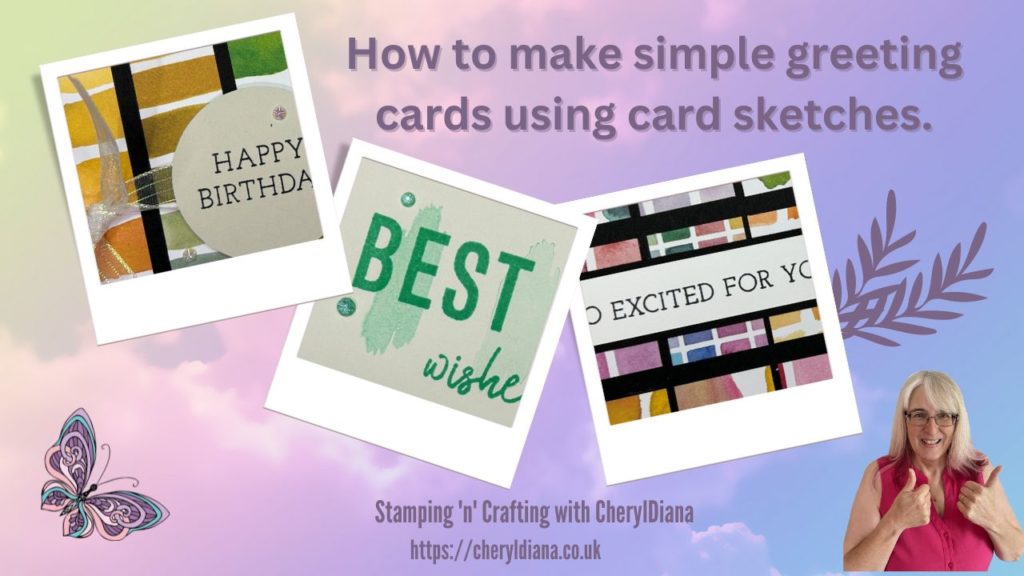
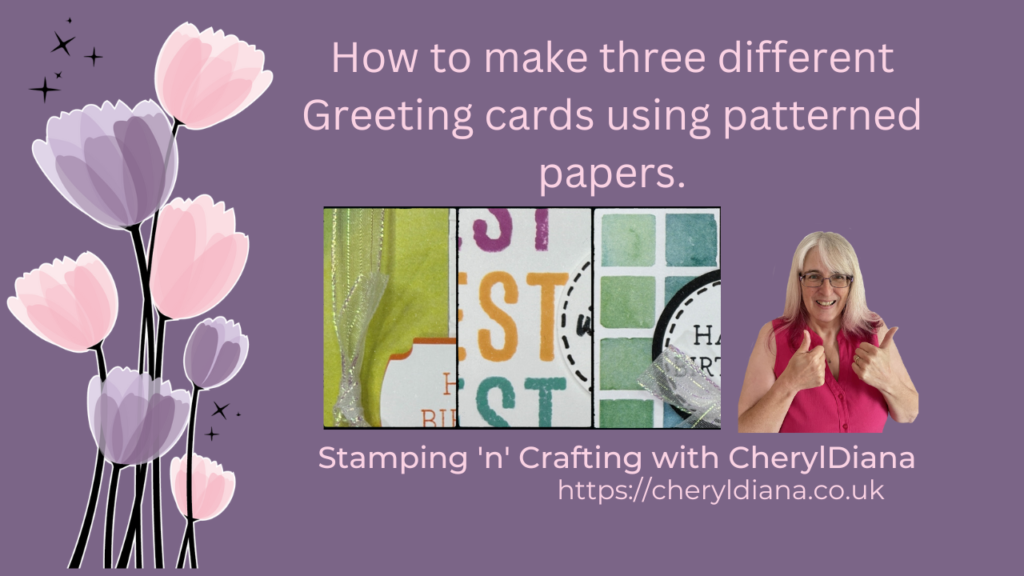
This time of year I have loads of birthdays so I decided to show you how to make 4 simple greeting cards using your papers. I know I have loads of designer series papers both from Stampin’ Up! that I really must use and I am sure you are the same. Here is a way to use up some of your designer series papers. I have chosen to use the Full of Life 6″x6″ designer series papers for mine.
Simple Greeting Card using your papers – Card 1
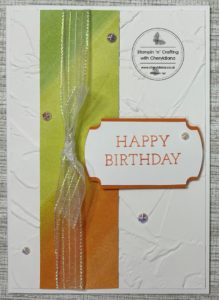
First I cut a A5 portrait card base using Basic White Thick card stock. Next I cut a mat layer using Basic White card stock and embossed it using the Painted Texture 3D embossing folder. I then cut a strip from one of the sheets of Full of Life DSP. Before sticking it down I cut a length of ribbon and attached it under each end using a glue dot.
Next I stamped the sentiment onto Basic White card stock using Pumpkin Pie ink and punched it out using the Label Me Punch. I then punched out the shape again but this time I used Pumpkin Pie card stock. Once punched out I cut it in half and stuck it to the back of the sentiment. This gives a small outline along the top and bottom of the sentiment. I added this to the card front using dimensionals and finished off with a few Iridescent Faceted Gems.
Simple Greeting Card using your papers – Card 2
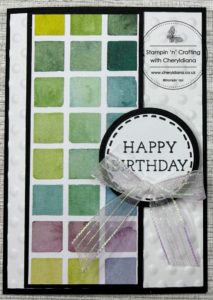
This time I made a portrait card base using Basic Black card stock. I then cut a mat layer using Basic White card stock and embossed it using the dotty folder from the Basic 3D embossing folders pack.
I then cut a strip of Designer Series Paper and mat layered it onto Basic Black card stock.
For the sentiment I stamped the words ‘Happy Birthday using Black Memento ink onto Basic White card stock and punched it out using the 1 3/4″ Circle Punch. Next I punched out another circle using the 2″ Circle Punch and Basic Black card stock. I stuck the Basic White circle onto the Basic Black circle before drawing dots around the Basic White circle using the Basic Black Stampin Write Marker.
Once this was done I added it to the card front using dimensionals. Finally I added a bow using the Iridescent 1/2″ Striped Trim and a glue dot.
Simple Greeting Card using your papers – Card 3
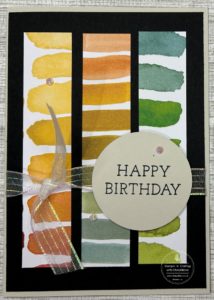
This time I made a portrait card base using Basic Beige card stock. I then cut a mat layer using Basic Black card stock. Next I cut my Designer Series Paper into 3 strips and stuck these onto the Basic Black mat layer.
I then put a length of Iridescent 1/2″ Striped Trim across the mat layer and stuck the ends onto the back using Glue Dots. Next I stuck the mat layer onto the Basic Beige card base. Then taking a smaller length of the ribbon I tied it to the ribbon across the front making a knot with long ends.
For the sentiment I again stamped the words ‘Happy Birthday’ using Black Memento ink but this time I used Basic Beige card stock, to match the card base. I used the 2″ Circle Punch to punch it out and again added it using dimensionals. Finally I added some Iridescent Faceted Gems to the card front.
Simple Greeting Card using your papers – Card 4
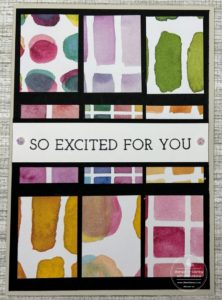
For my last card I again used a Basic Beige portrait card base. I cut a mat layer using Basic Black card stock. Next I cut my Designer Series Paper into 9 rectangles before sticking them onto the Basic Black mat layer.
I stamped the words ‘So excited For You’ onto a strip of Basic White card stock. I chose to use Basic White so that it matched the white in the papers. I then cut a mat layer using Basic Black card stock and stuck the two together before sticking to the card front. Finally I finished off the card using Iridescent Faceted Gems.
I hope that you have loved seeing the greeting cards I made using my papers. Why not have a go at making some of these yourself to may your own greeting cards using your papers.
If you would like to see me actually making them there here are my YouTube links:
Click Here for my Facebook Page.
Until next time, keep stampin n crafting,

Please click on the names below to visit each website and see what lovely projects the others have designed for their Birthday Blog Hop. Please do leave comments as you visit each one. Thank you.
Blog Hop List
Product List
Product List")
")
")
 Designer Series Paper")
")


 Striped Trim")


FREE TUTORIAL WITH EVERY ORDER
When shopping through my Stampin’ Up! online shop, you will receive an FREE TUTORIAL of 5 simple card ideas. Learn more!
Spend over £45 (before postage and packing) and also receive another FREE Tutorial with 15 more detailed giftable ideas. Learn more!
Wish to Order. Click here to shop
Thank you for shopping with me!
Remember for every order over £20.00 you will receive 10% rewards to use on your next order.
- Why not subscribe to Paper Pumpkin and get a different surprise kit each month through the post. The monthly subscription price also includes postage.
- For beginner crafters, crafting on the move or as a gift then have a look at our Kits Collection. Each month there are two NEW Kits to choose from.
- For even more options on top of what is in the catalogue have a look at the Online Exclusive selection.

I am an Independent Stampin’ Up! demonstrator for the UK, Ireland, France, Belgium, The Netherlands, Germany and Austria.
Postage is a flat rate of £6.95 / €7.95. Shop for your Stampin’ Up! products here.
Do you need any help?
If you have any questions or need any help with an order then please email me.
Join my Team with a Starter Kit
I would love you to join my team of A Kaleidoscope of Stampers. We are a wonderful, friendly group of crafters who love getting discounts on our hobby or even run a part time or full time business sharing Stampin’ Up! products.
You can find out more here or join straight away.


Brilliant way to use up the DSP, tfs.
love the design
So clever and a great way to use up DSP!
Nice use of the DSP! Great cards!
love these cards and love these papers ?