
Welcome to the Tech 4 Stampers Academy Blog Hop.
The theme this month is Vellum.
For this month’s blog hop I decided to use the Cheerful Daisies stamp set and matching dies to make a birthday card using vellum. I got the idea from seeing fellow demonstrators cards where they heat embossed onto vellum. Also this is a trial to see if it would work on vellum as I need to do this for my daughter’s menus for her wedding next year.
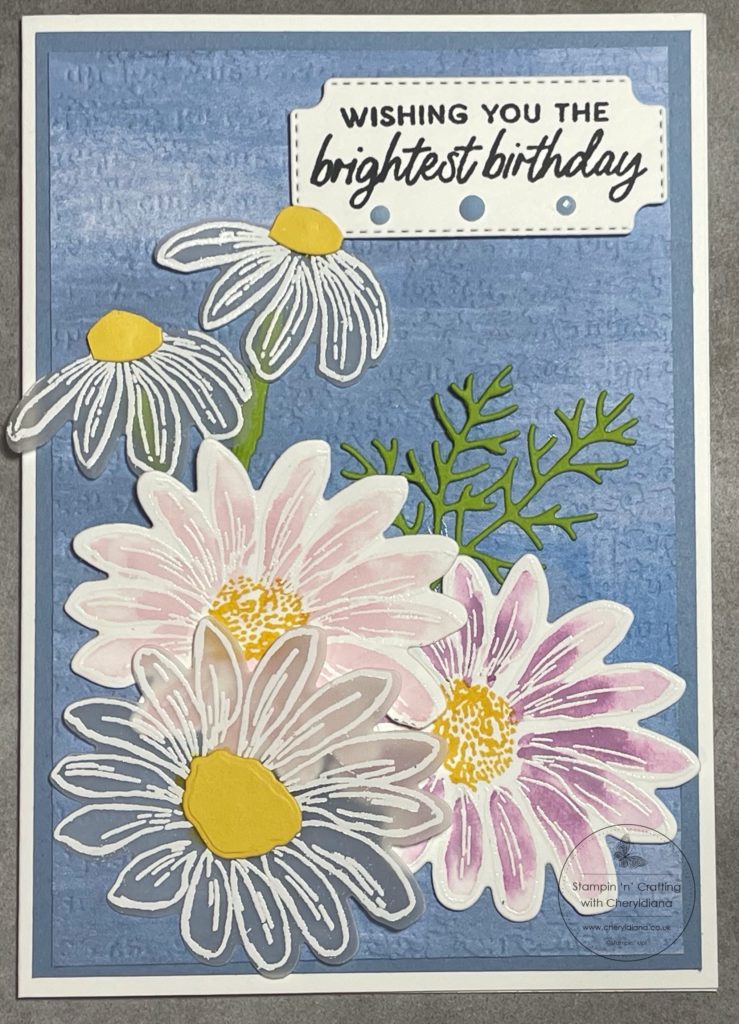
First of all I cut a portrait card base using Basic White Thick card stock. Next I cut a mat layer using Boho Blue card stock and stuck it onto the card base. After that I cut a mat layer using the Fresh As A Daisy DSP which I embossed using the Timeworn 3D embossing folder before sticking it onto the Boho Blue mat layer.
How I made the flowers for my Birthday card using vellum.
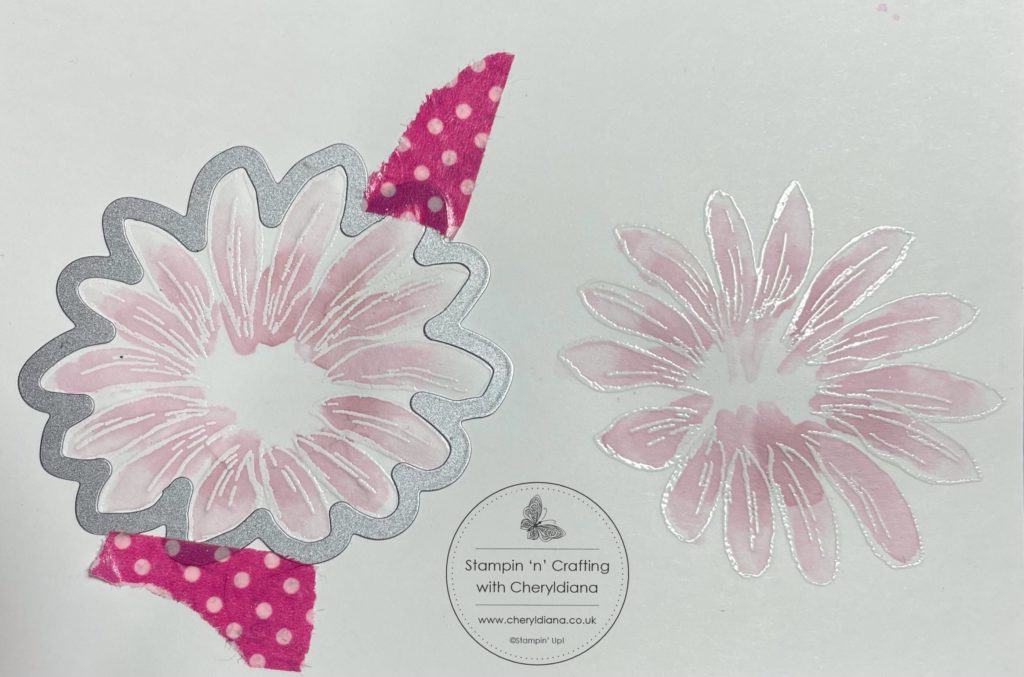
To make the daisies I stamped the flower outline images onto Basic White card stock and onto vellum using versamark ink. After that I heat embossed them using white embossing powder. Remember to let your heat tool heat up before you hold it over your card stock and vellum as this speeds up the embossing powder quicker. Next using Fresh Freesia and Bubble Bath ink refills I put a drop onto a block so that I could watercolour the daisies. I first added some water to the petals using a aqua painter and then added the ink to the water. This allowed the ink to spread out and give a gradient effect on the petals. Once I was happy with the petals I let the daisies dry. After they had dried I stamped the flower centres using Daffodil Delight ink before die cutting them and the vellum flowers out.
How I assembled my Birthday card using vellum.
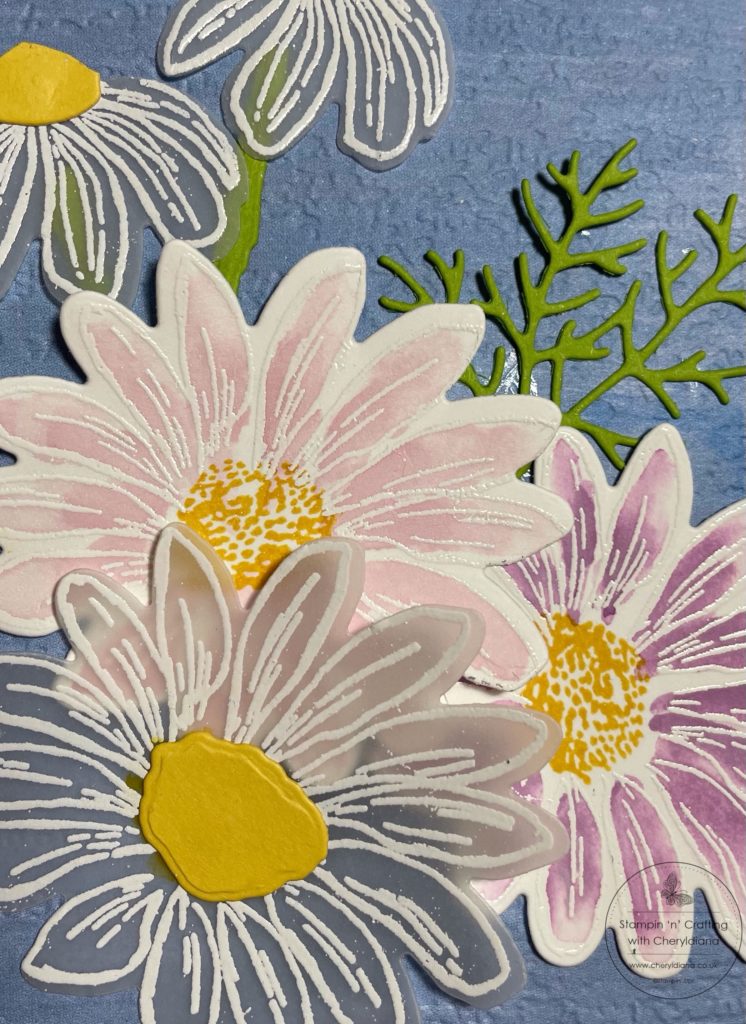
First I die cut out the frilly leaf and the stems using Granny Apple Green card stock. Next I laid out the flowers and once I was happy I stuck the pink and purple flowers onto the card front using glue in the middle. Next I glued the frilly leaf and stems behind the flowers. Now came the hard bit sticking the vellum down so that it would not show . For this I decided to die cut out the flower centres using Daffodil Delight card stock. I stuck the flower centres onto the daisies using glue dots. This meant that I could add the vellum daisies to the card front using glue dots which would be hidden under the flower centres.
How I finished my Birthday card using vellum.

To finish my Birthday card I stamped the sentiment onto Basic White card stock using Black Memento ink and die cut it out using the sentiment die. I added the sentiment to the card front using Stampin’ Dimensionals. Finally I added 3 Boho Blue Adhesive Backed Solid Gems underneath the words.
I hope you have enjoyed seeing my Birthday card that I made using vellum. Why not have a go at heat embossing vellum yourself and share what you have made onto my Facebook page or email a photo to me direct.
Click Here for my Facebook Page.
Until next time, keep stampin n crafting,

Please click on the names below to visit each website and see what lovely projects the others have designed for their Vellum themed Blog Hop. Please do leave comments as you visit each one. Thank you.
Blog Hop List
Product List
FREE TUTORIAL WITH EVERY ORDER
When shopping through my Stampin’ Up! online shop, you will receive an FREE TUTORIAL of 6 simple card ideas. Learn more!
Spend over £45 (before postage and packing) and also receive another FREE Tutorial with 14 more detailed giftable ideas. Learn more!

Wish to Order. Click here to shop
Thank you for shopping with me!
Remember for every order over £20.00 you will receive 10% rewards to use on your next order.
- Why not grab a bargain at the Last Chance Products – Save up to 60% ‘whilst stocks last’.
- For beginner crafters, crafting on the move or as a gift then have a look at our Kits Collection. Each month there are two NEW Kits to choose from.
- For even more options on top of what is in the catalogue have a look at the Online Exclusive selection.

I am an Independent Stampin’ Up! demonstrator for the UK, Ireland, France, Belgium, The Netherlands, Germany and Austria.
Postage is a flat rate of £6.95 / €7.95. Shop for your Stampin’ Up! products here.
Do you need any help?
If you have any questions or need any help with an order then please email me.
Join my Team with a Starter Kit
I would love you to join my team of A Kaleidoscope of Stampers. We are a wonderful, friendly group of crafters who love getting discounts on our hobby or even run a part time or full time business sharing Stampin’ Up! products.
You can find out more here or join straight away.







I haven’t got this set but I might have to get it now! Lovely card.
lovely project as always, thanks for sharing Cheryl
Those daisies are gorgeous and the vellum adds lovely texture.