Welcome to this month’s Ink, Stamp, Share Monthly Showcase Blog Hop
This month I am showing you how I made some male birthday cards using the Timeless Greetings Kit. I tend not to use out kits to make cards but this year I have tasked my self to make up the kits and to design other cards using the elements in the kit. As it is my son’s birthday this month I wanted a special card but working full time finding time to craft can be difficult. In the Timeless Greetings Kit you get everything you need including a Stampin’ Spot (mini ink pad) to make 8 cards. As the kit has a Stampin’ Spot and stamp set you can use these to make other cards. So scroll down to see how I made some other cards using this kit.
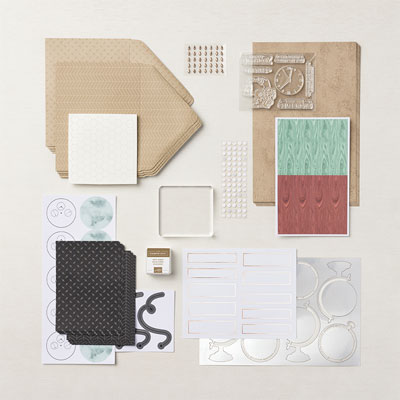
In this kit you get enough product including instructions to make 8 card bases and envelopes.
How I made some Male Birthday Cards using the Timeless Greetings Kit.
Male Birthday Card 1 using the Timeless Greetings Kit
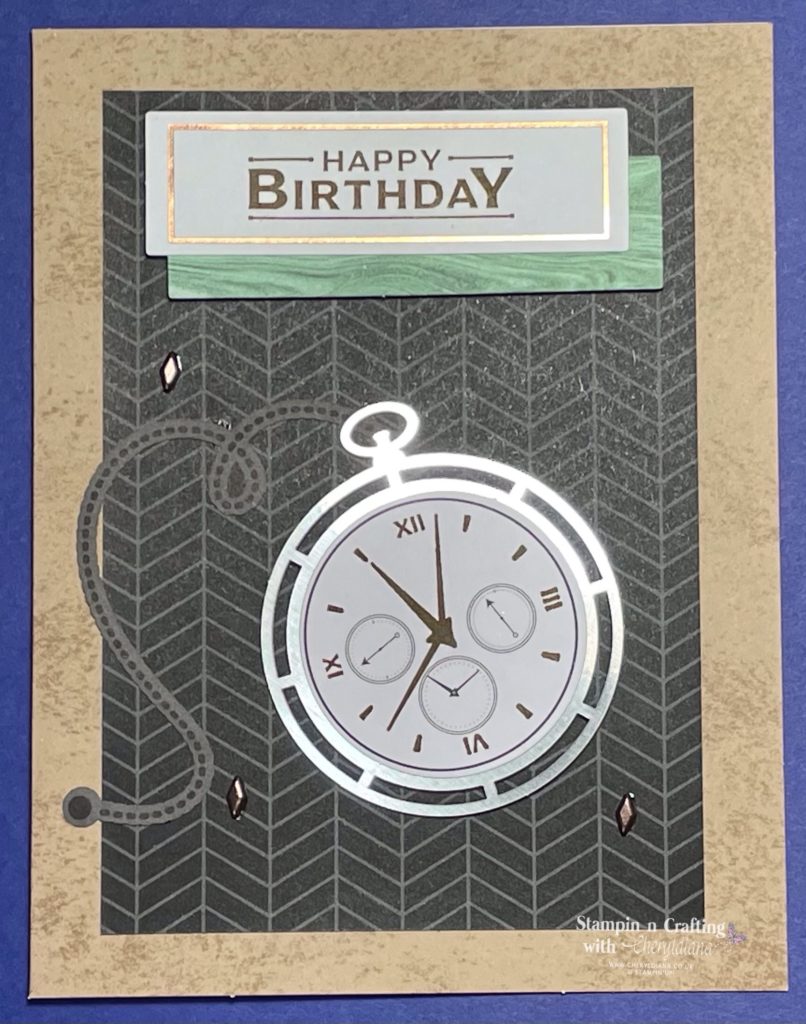
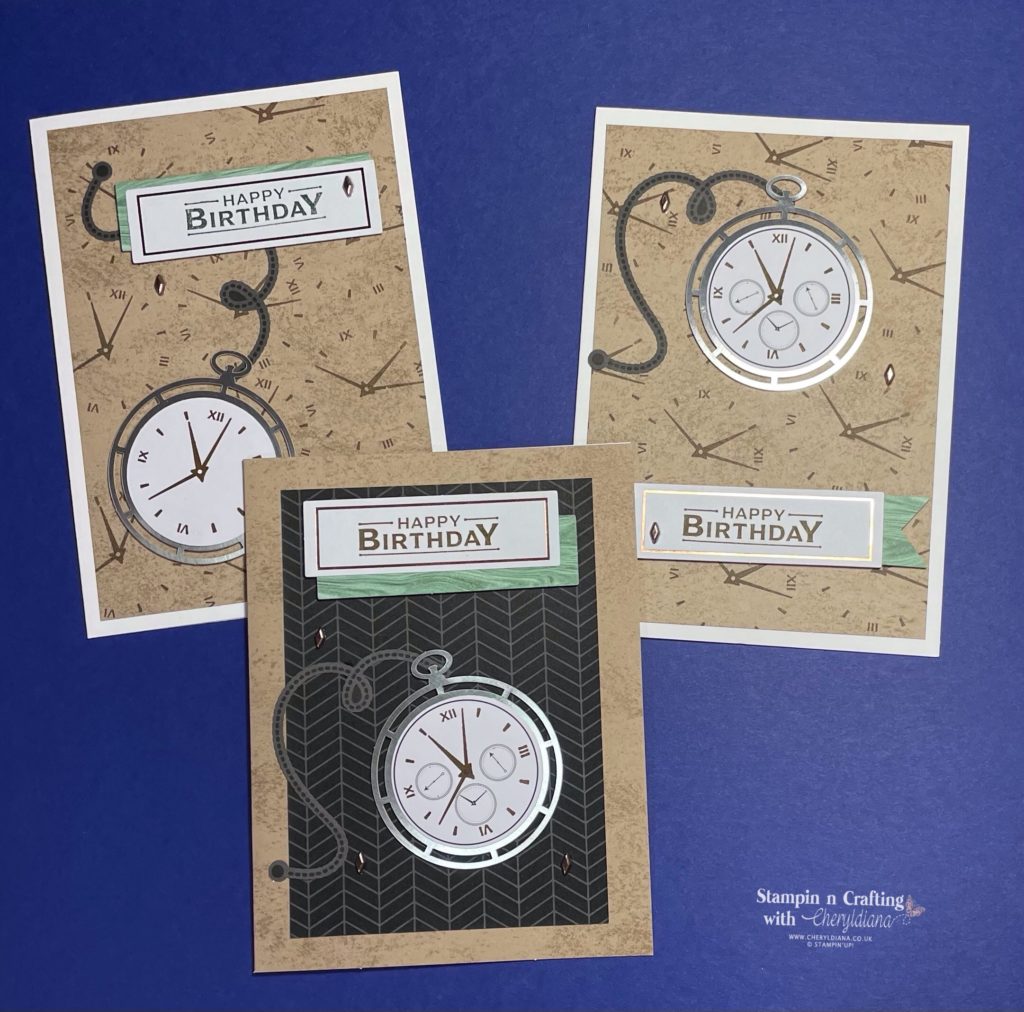
First I started by making one of the cards as per the instructions in the kit.
Male Birthday Card 2 using the Timeless Greetings Kit
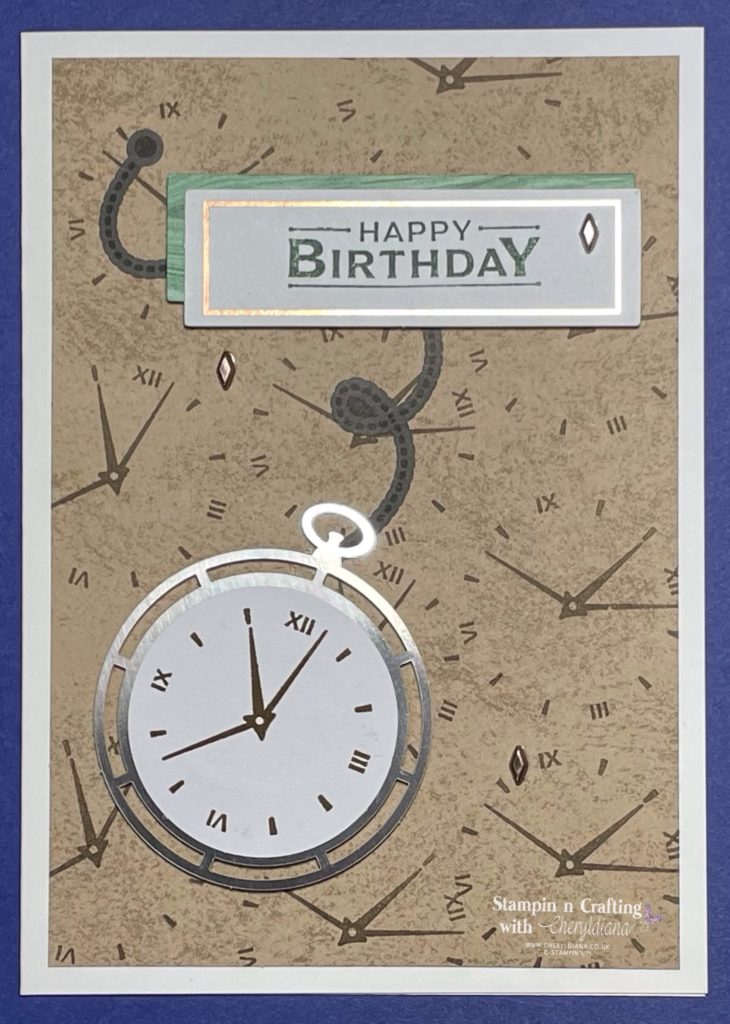
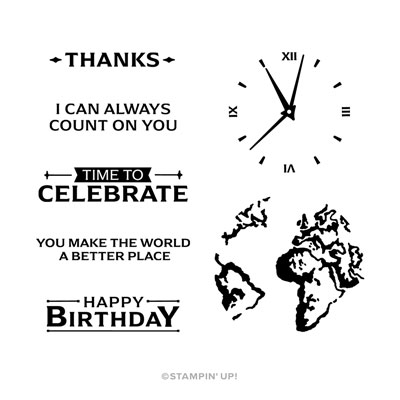
For my second card I cut a Basic White portrait card case. Next I cut one of the card bases to make a mat layer for my card base. Then using the clock face image I stamped all over this mat layer using Soft Suede ink to make my own back ground image. Next I stuck this mat layer onto the card base. I then stamped the clock face image onto the push out clock face using Soft Suede ink. I had to stamp the back as I messed up the front. This I then stuck onto the push out clock before adding to the card base using Stampin’ Dimensionals. I then stuck the clock chain onto the mat layer.
For the sentiment I stamped the ‘Happy Birthday’ sentiment onto one of the push out rectangles again using Soft Suede ink. I then pushed out one of the green mat layers in half and stuck it to the sentiment and added it to the top of the card base. I then added some of the lovely bronze embellishments to the card.
Male Birthday Card 3 using the Timeless Greetings Kit
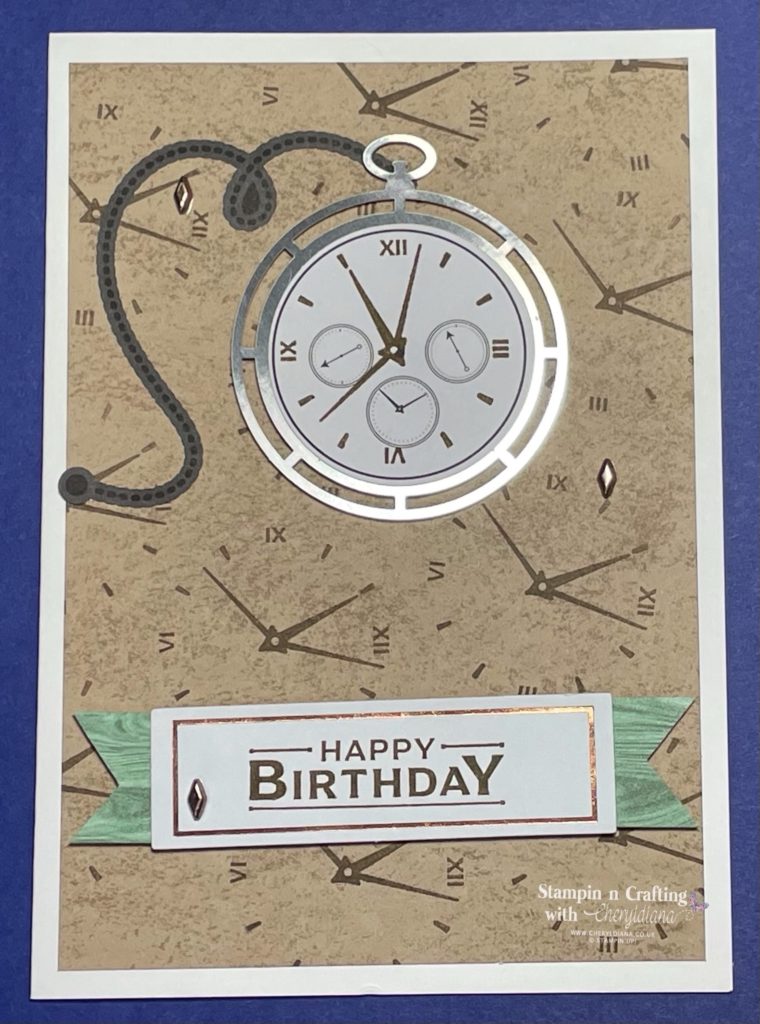
For my final card I again cut a Basic White portrait card case. Again I cut one of the card bases to make a mat layer for my card base. Then using the clock face image I stamped all over this mat layer using Soft Suede ink to make my own back ground image. Next I stuck this mat layer onto the card base. I then stamped the clock face image onto the push out clock face using Soft Suede ink. This I then stuck onto the push out clock before adding to the card base using Stampin’ Dimensionals. I then stuck the clock chain onto the mat layer.
For the sentiment I stamped the ‘Happy Birthday’ sentiment onto one of the push out rectangles again using Soft Suede ink. I then cut one of the green mat layers in half and flagged the ends before sticking to the sentiment and adding to the bottom of the card base. Then I added some of the bronze embellishments to the card.
I enjoyed designing with the Timeless Greetings Kit and making the tree male birthday cards. Why not have a go at using this kit to one of our other kits to make some cards. Please do share what you make onto my Facebook page.
Click Here for my Facebook Page.
Until next time, keep stampin n crafting,

Thank you for visiting my website today. Please click on the list below to see what the other demonstrators have chosen to showcase this month. Please do leave comments as you visit each person. Thank you.
Blog Hop List
Product List
FREE TUTORIAL WITH EVERY ORDER
When shopping through my Stampin’ Up! online shop, you will receive an FREE TUTORIAL of 6 simple card ideas. Learn more!
Spend over £45 (before postage and packing) and also receive another FREE Tutorial with 14 more detailed giftable ideas. Learn more!

Wish to Order. Click here to shop
Thank you for shopping with me!
Remember for every order over £20.00 you will receive 10% rewards to use on your next order.
- Why not grab a bargain at the Last Chance Products – Save up to 60% ‘whilst stocks last’.
- For beginner crafters, crafting on the move or as a gift then have a look at our Kits Collection. Each month there are two NEW Kits to choose from.
- For even more options on top of what is in the catalogue have a look at the Online Exclusive selection.

I am an Independent Stampin’ Up! demonstrator for the UK, Ireland, France, Belgium, The Netherlands, Germany and Austria.
Postage is a flat rate of £6.95 / €7.95. Shop for your Stampin’ Up! products here.
Do you need any help?
If you have any questions or need any help with an order then please email me.
Join my Team with a Starter Kit
I would love you to join my team of A Kaleidoscope of Stampers. We are a wonderful, friendly group of crafters who love getting discounts on our hobby or even run a part time or full time business sharing Stampin’ Up! products.
You can find out more here or join straight away.






You certainly made use of all the elements in this kit, it is a great one for masculine cards (which I struggle with making) thanks for sharing
Great cards Cheryl x
Love this kit Cheryl, great masculine cards x